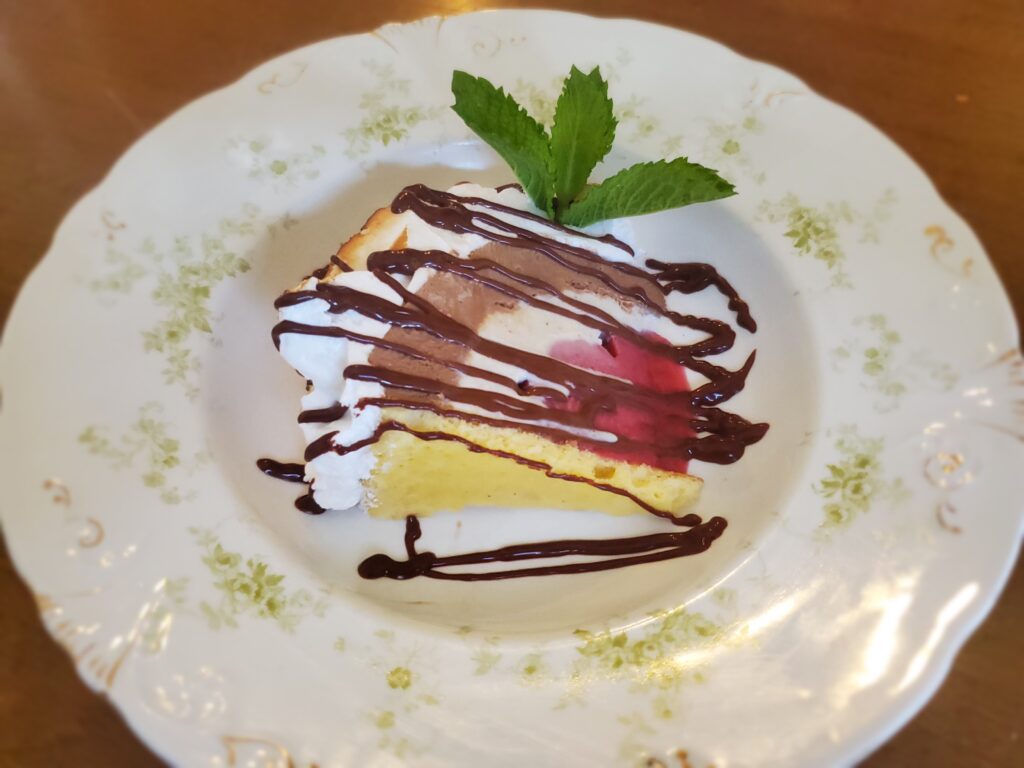
Baked Alaska
For me, Baked Alaska brings back very fond memories of my time at Glorious Food caterers in the late 1980’s and 1990’s, where this wonderful dessert was served at many large, elegant events at New York’s museums, cultural institutions and other venues.
In the kitchen, days before the event, ice cream store sized tubs of H¤agen Dazs would be opened up, cut into large chunks, and placed in the 20-qt Hobart mixer to be mixed just enough to make it malleable, then spread inside small stainless bowls. The first flavor would be frozen, then the process repeated with two additional flavors.
Baked Alaska
| Yield: 1 7-inch Baked Alaska | # of Servings: 8 |
Ingredient
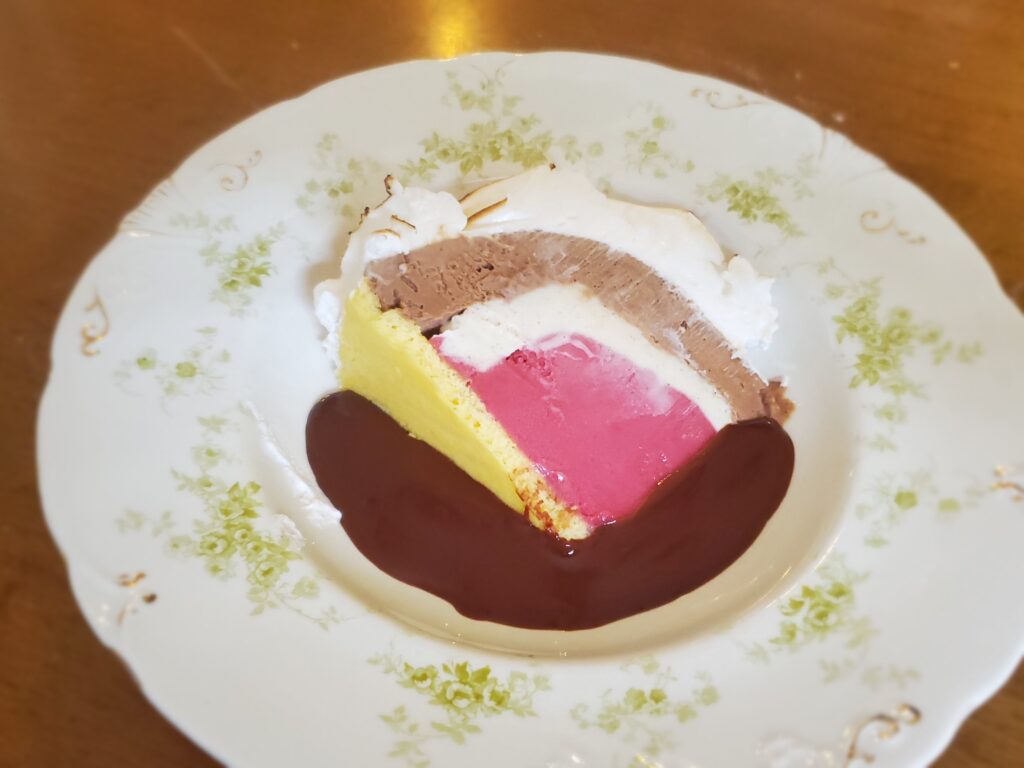
1 pint each of three flavors of ice cream, either homemade or store bought.
1 recipe Basic Sponge Sheet
1 recipe Italian Meringue
1 recipe Chocolate Sauce
Special equipment needed:
- 1 qt stainless mixing bowl – recommended measurements 7 ¾ “diameter, 2 ½” height.
- Ice cream maker, if making homemade ice cream
- Countertop mixer with paddle, if using store bought ice cream
- 21″ pastry bag with a St. Honore tip (Ateco 882) or a star tip (Ateco 845 or 846)
- Kitchen torch
Pre-recipe preparations:
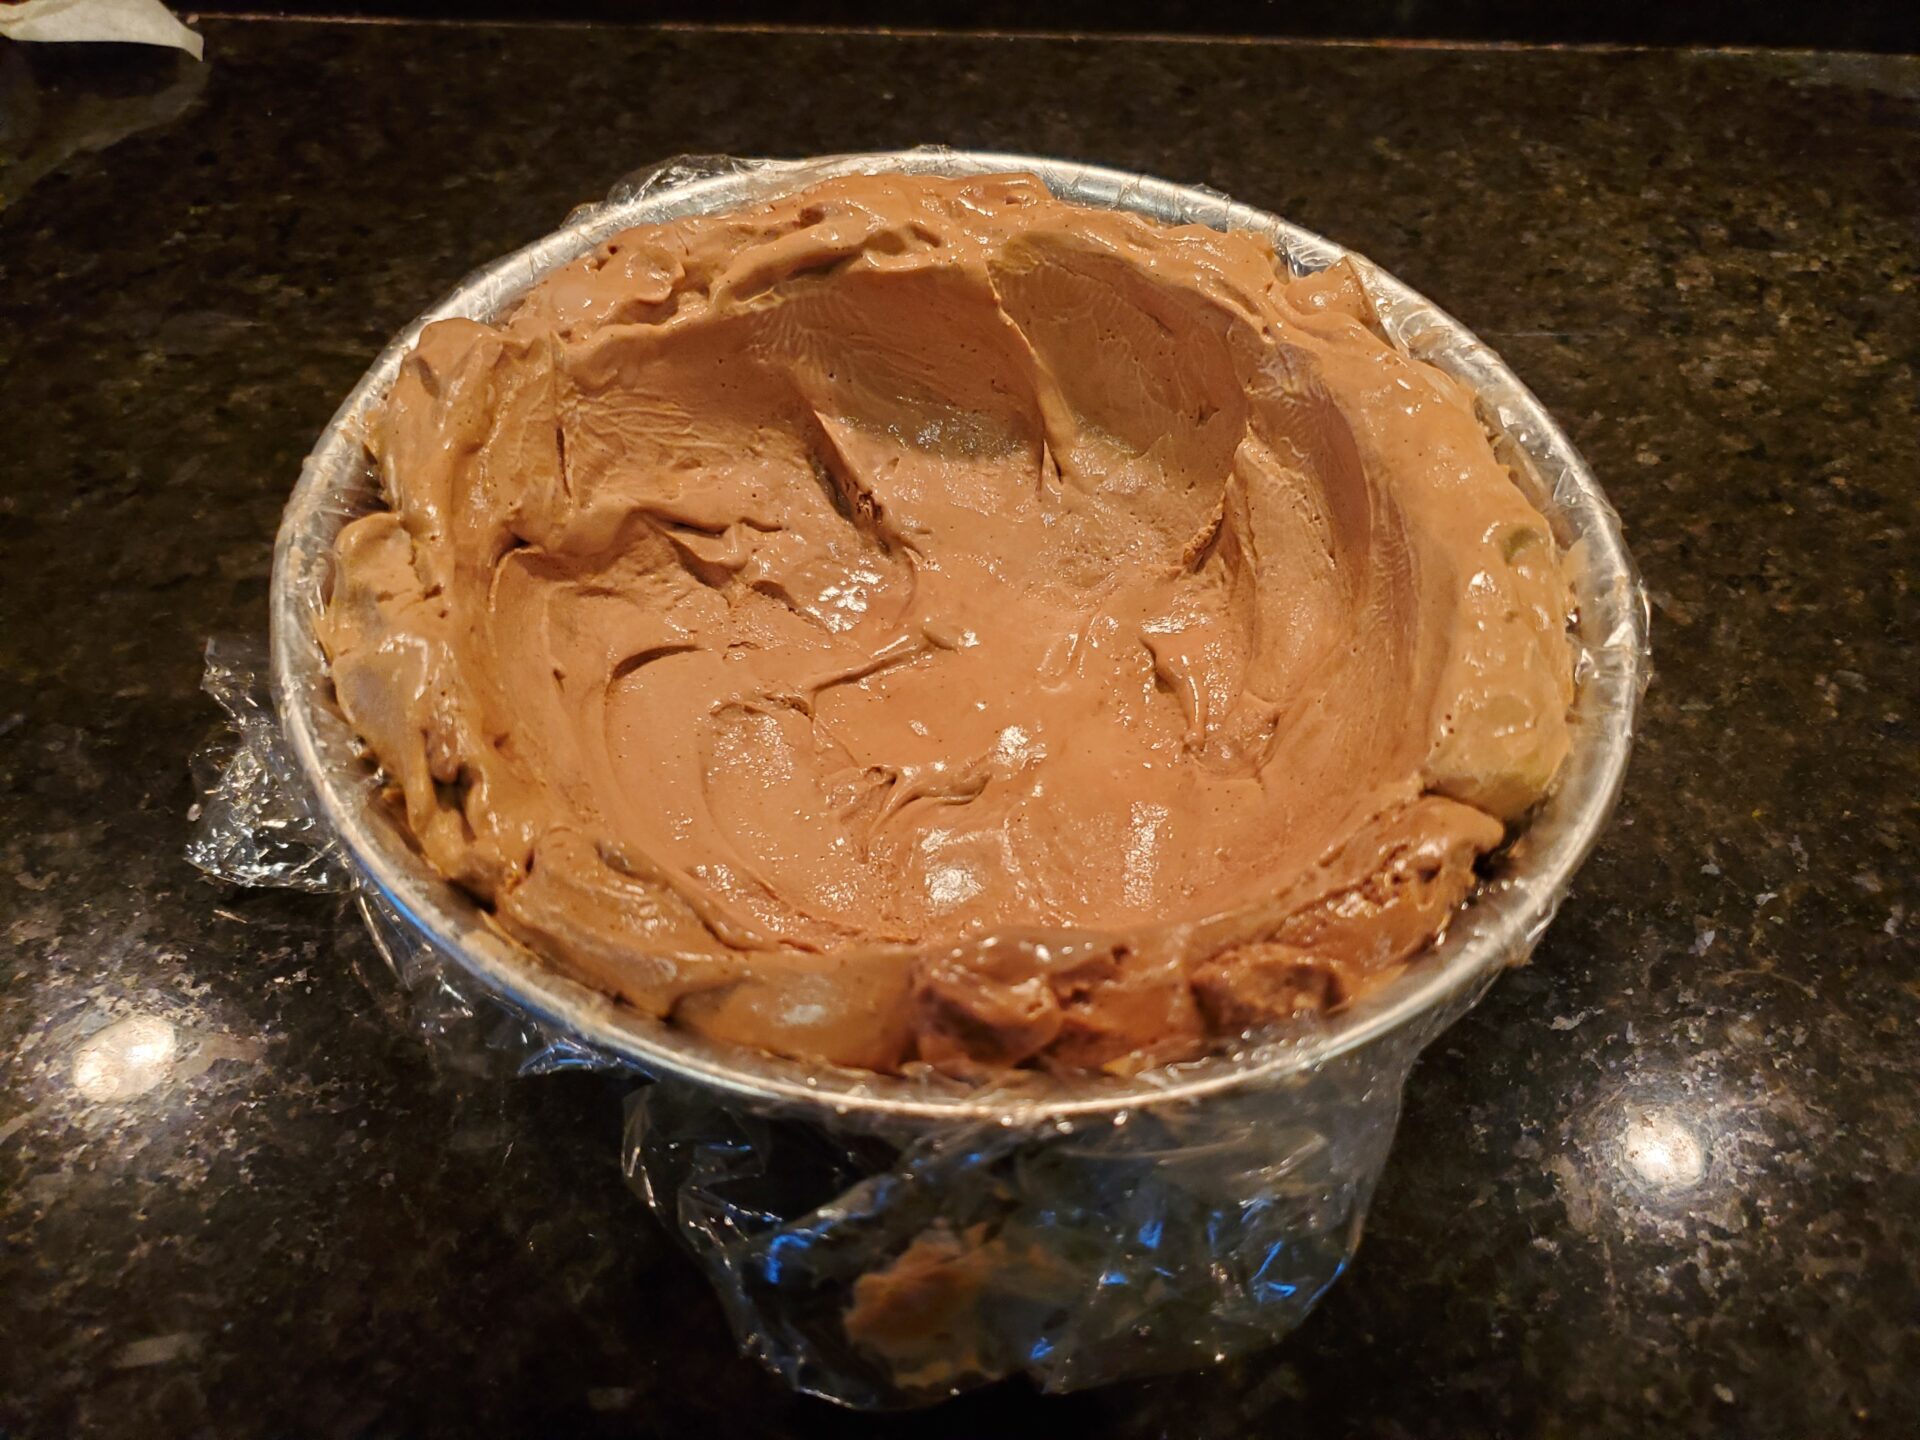
- Line the bowl with enough plastic film to overhang the bowl by at least 2 inches.
- Bake the Basic Sponge Sheet, cut a circle the size of the bowl’s outer diameter. Wrap and freeze.
Directions:
Homemade ice cream:
- Make the first flavor of ice cream. Place in plastic container and freeze for approximately 30 minutes, until the ice cream begins to firm up but is still malleable.
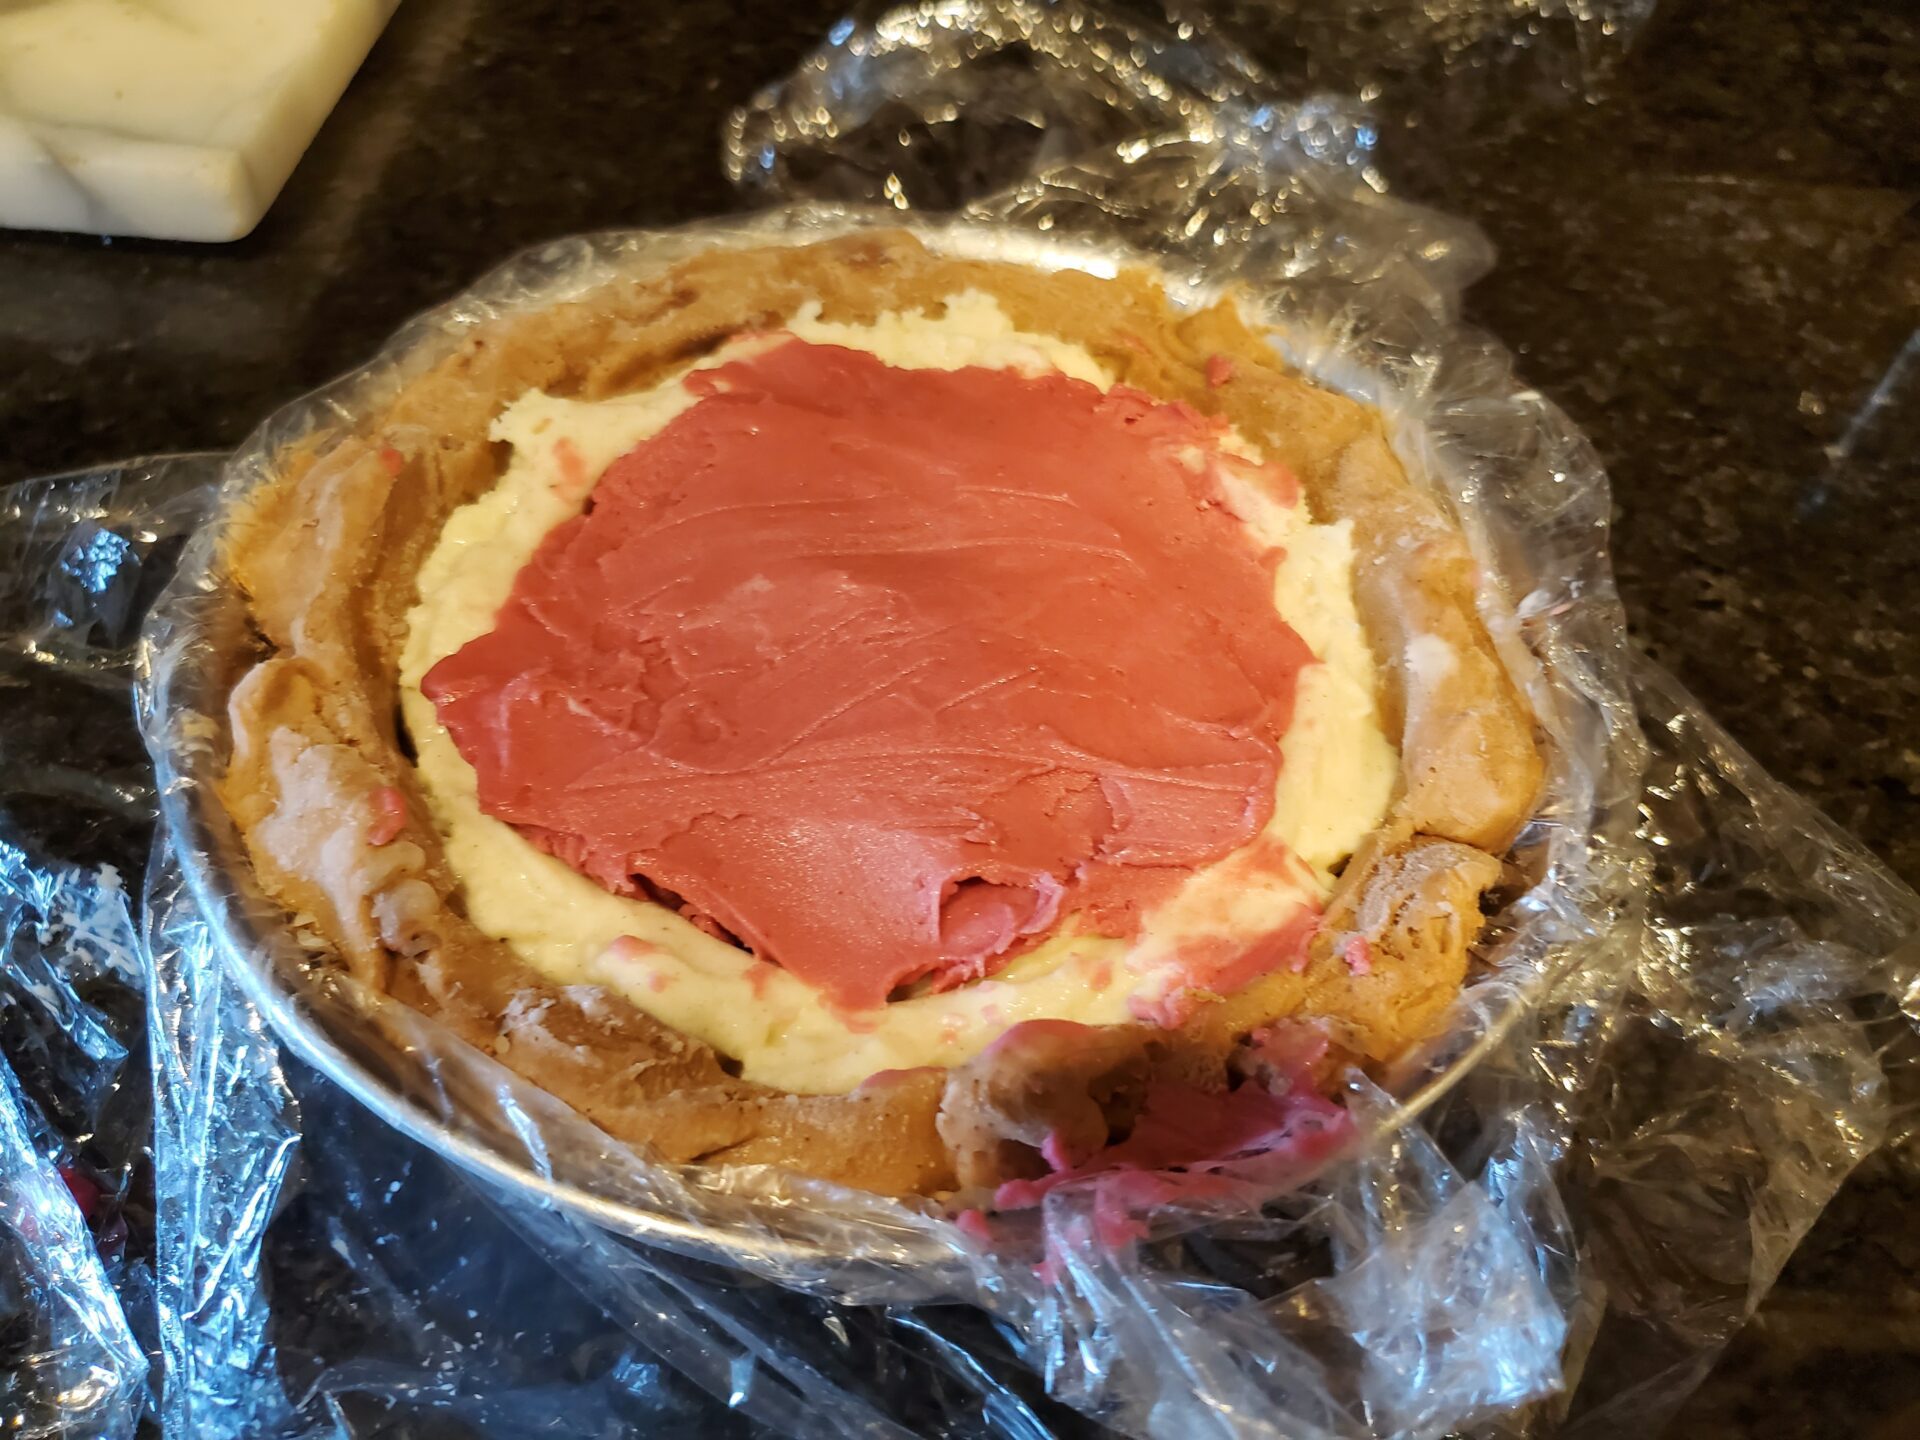
- Using the back of a teaspoon spoon dipped in hot water, spread a core layer of ice cream, filling approximately â…“ of the bowl. Freeze several hours until solid.
- Repeat with next 2 flavors. When final flavor is added (before returning to freezer)1 proceed to Adding the sponge cake circle steps.
Store bought ice cream:
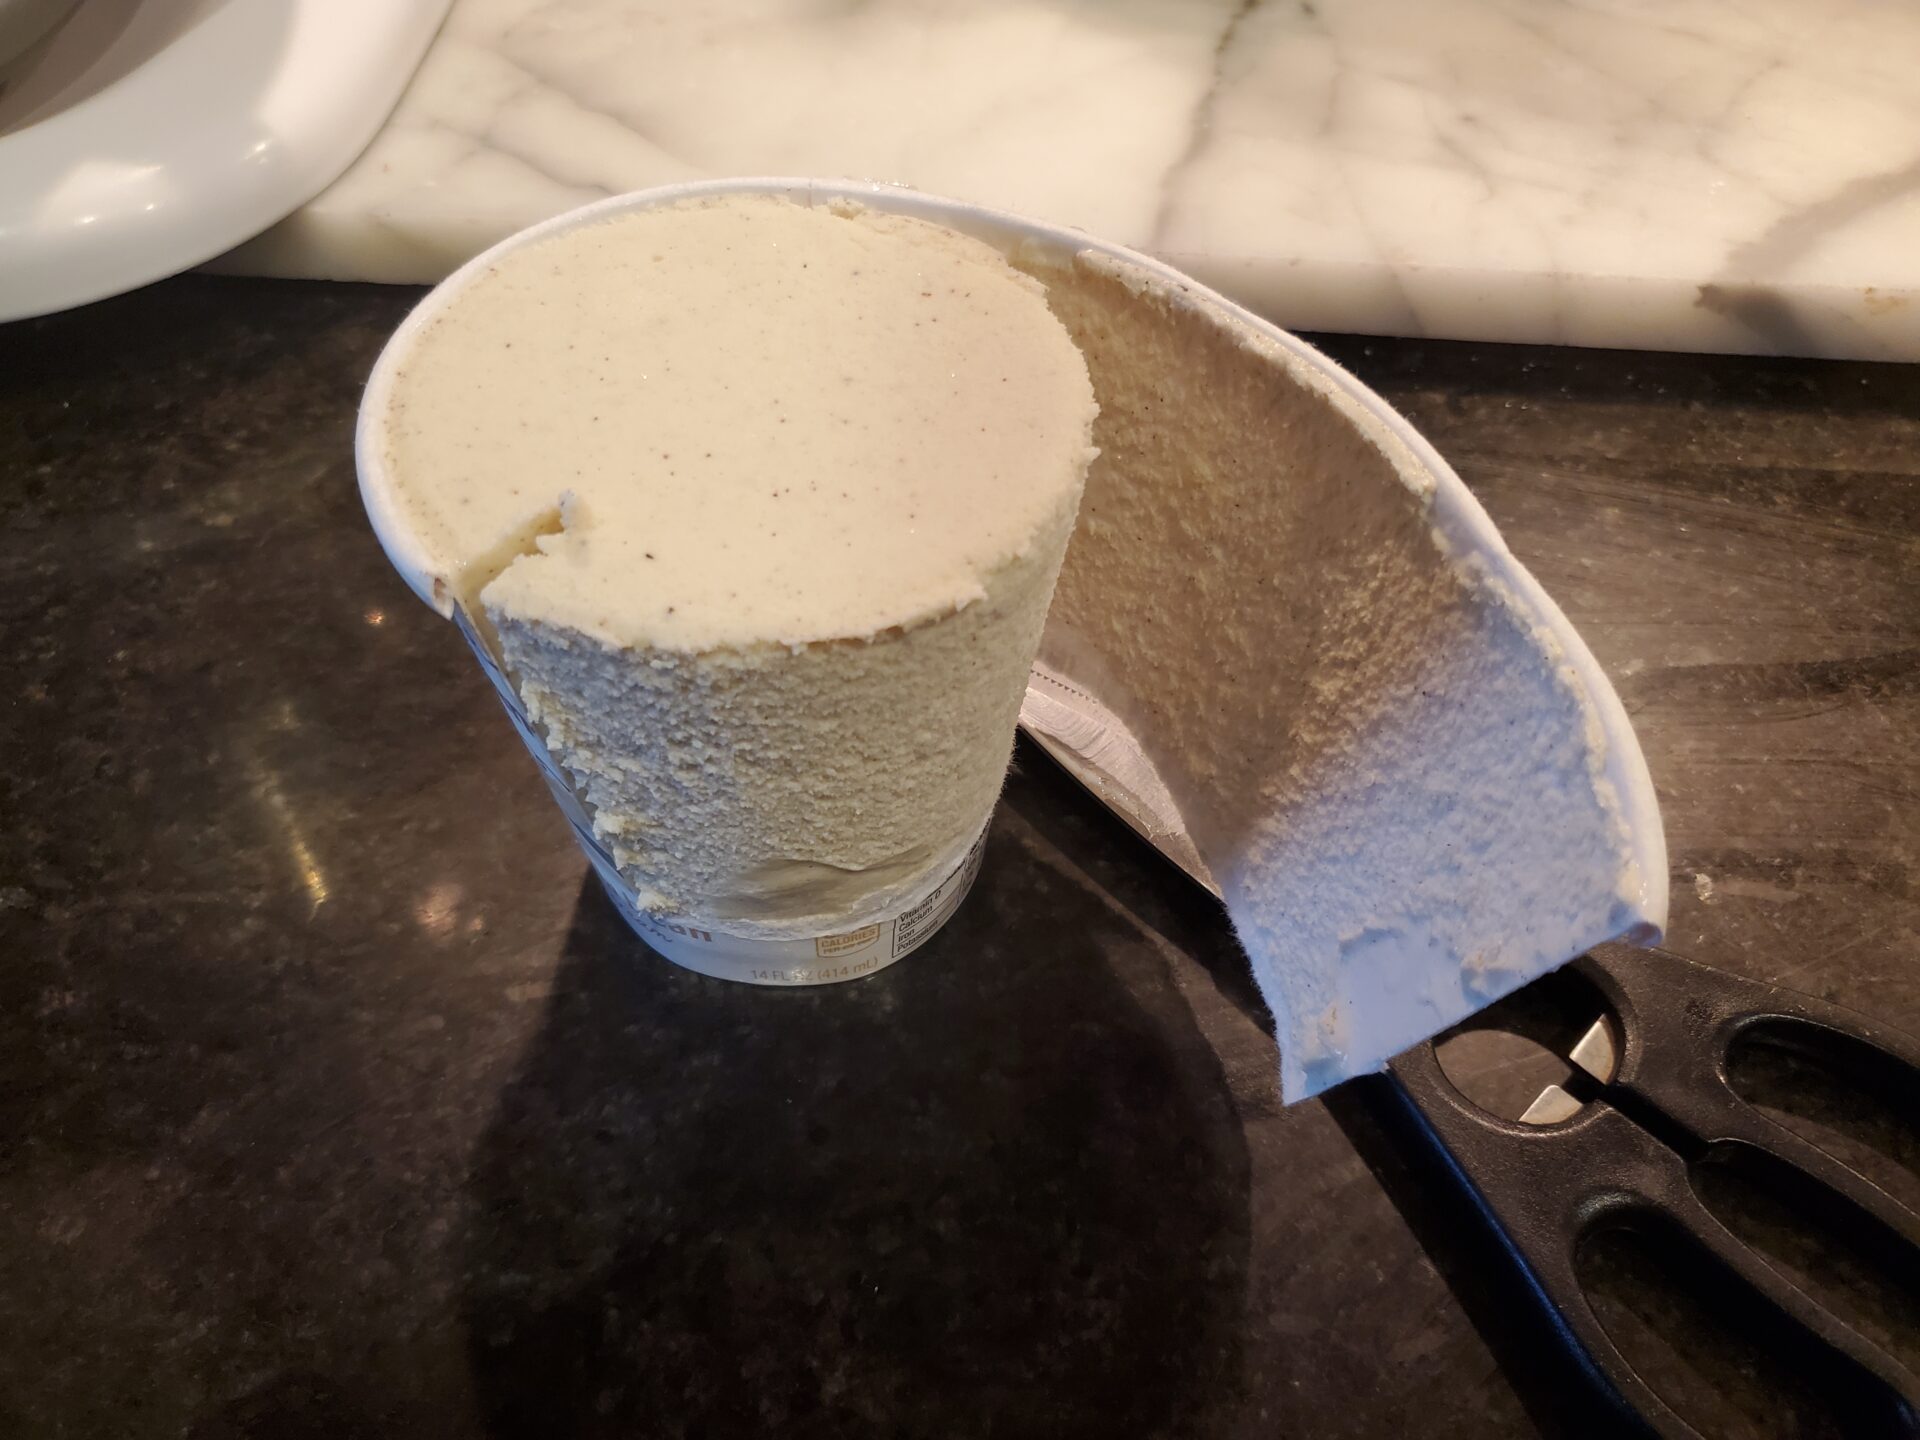
- Place mixer bowl and paddle in refrigerator at least 30 minutes.
- Using heavy scissors cut away the sides of the ice cream container.
- Place ice cream on cutting board and carefully cut into thirds.
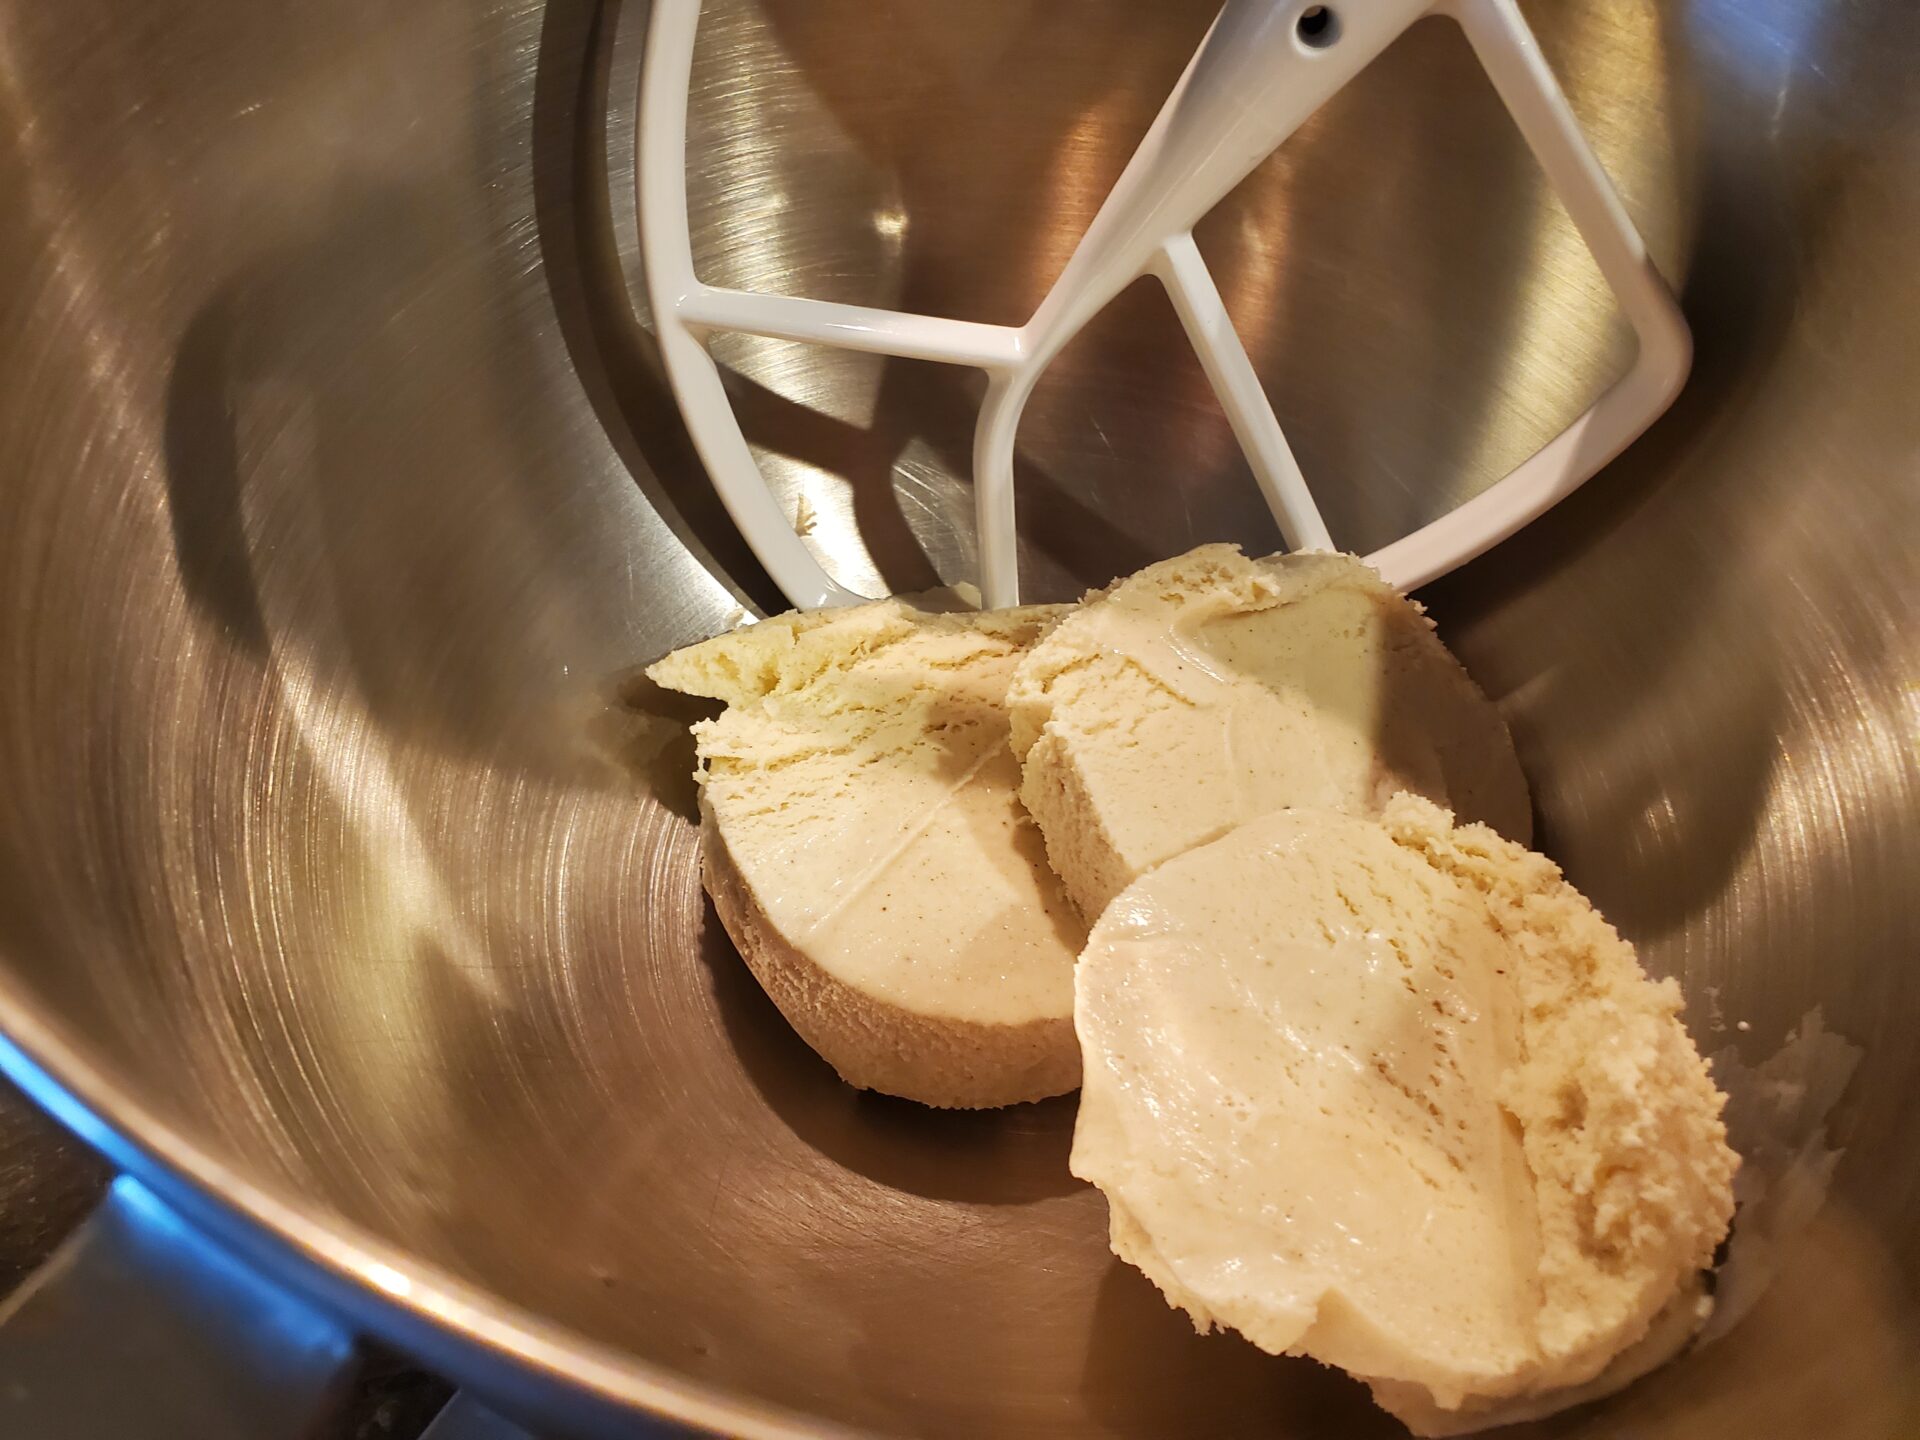
- Place in mixer bowl and beat with paddle just until malleable.
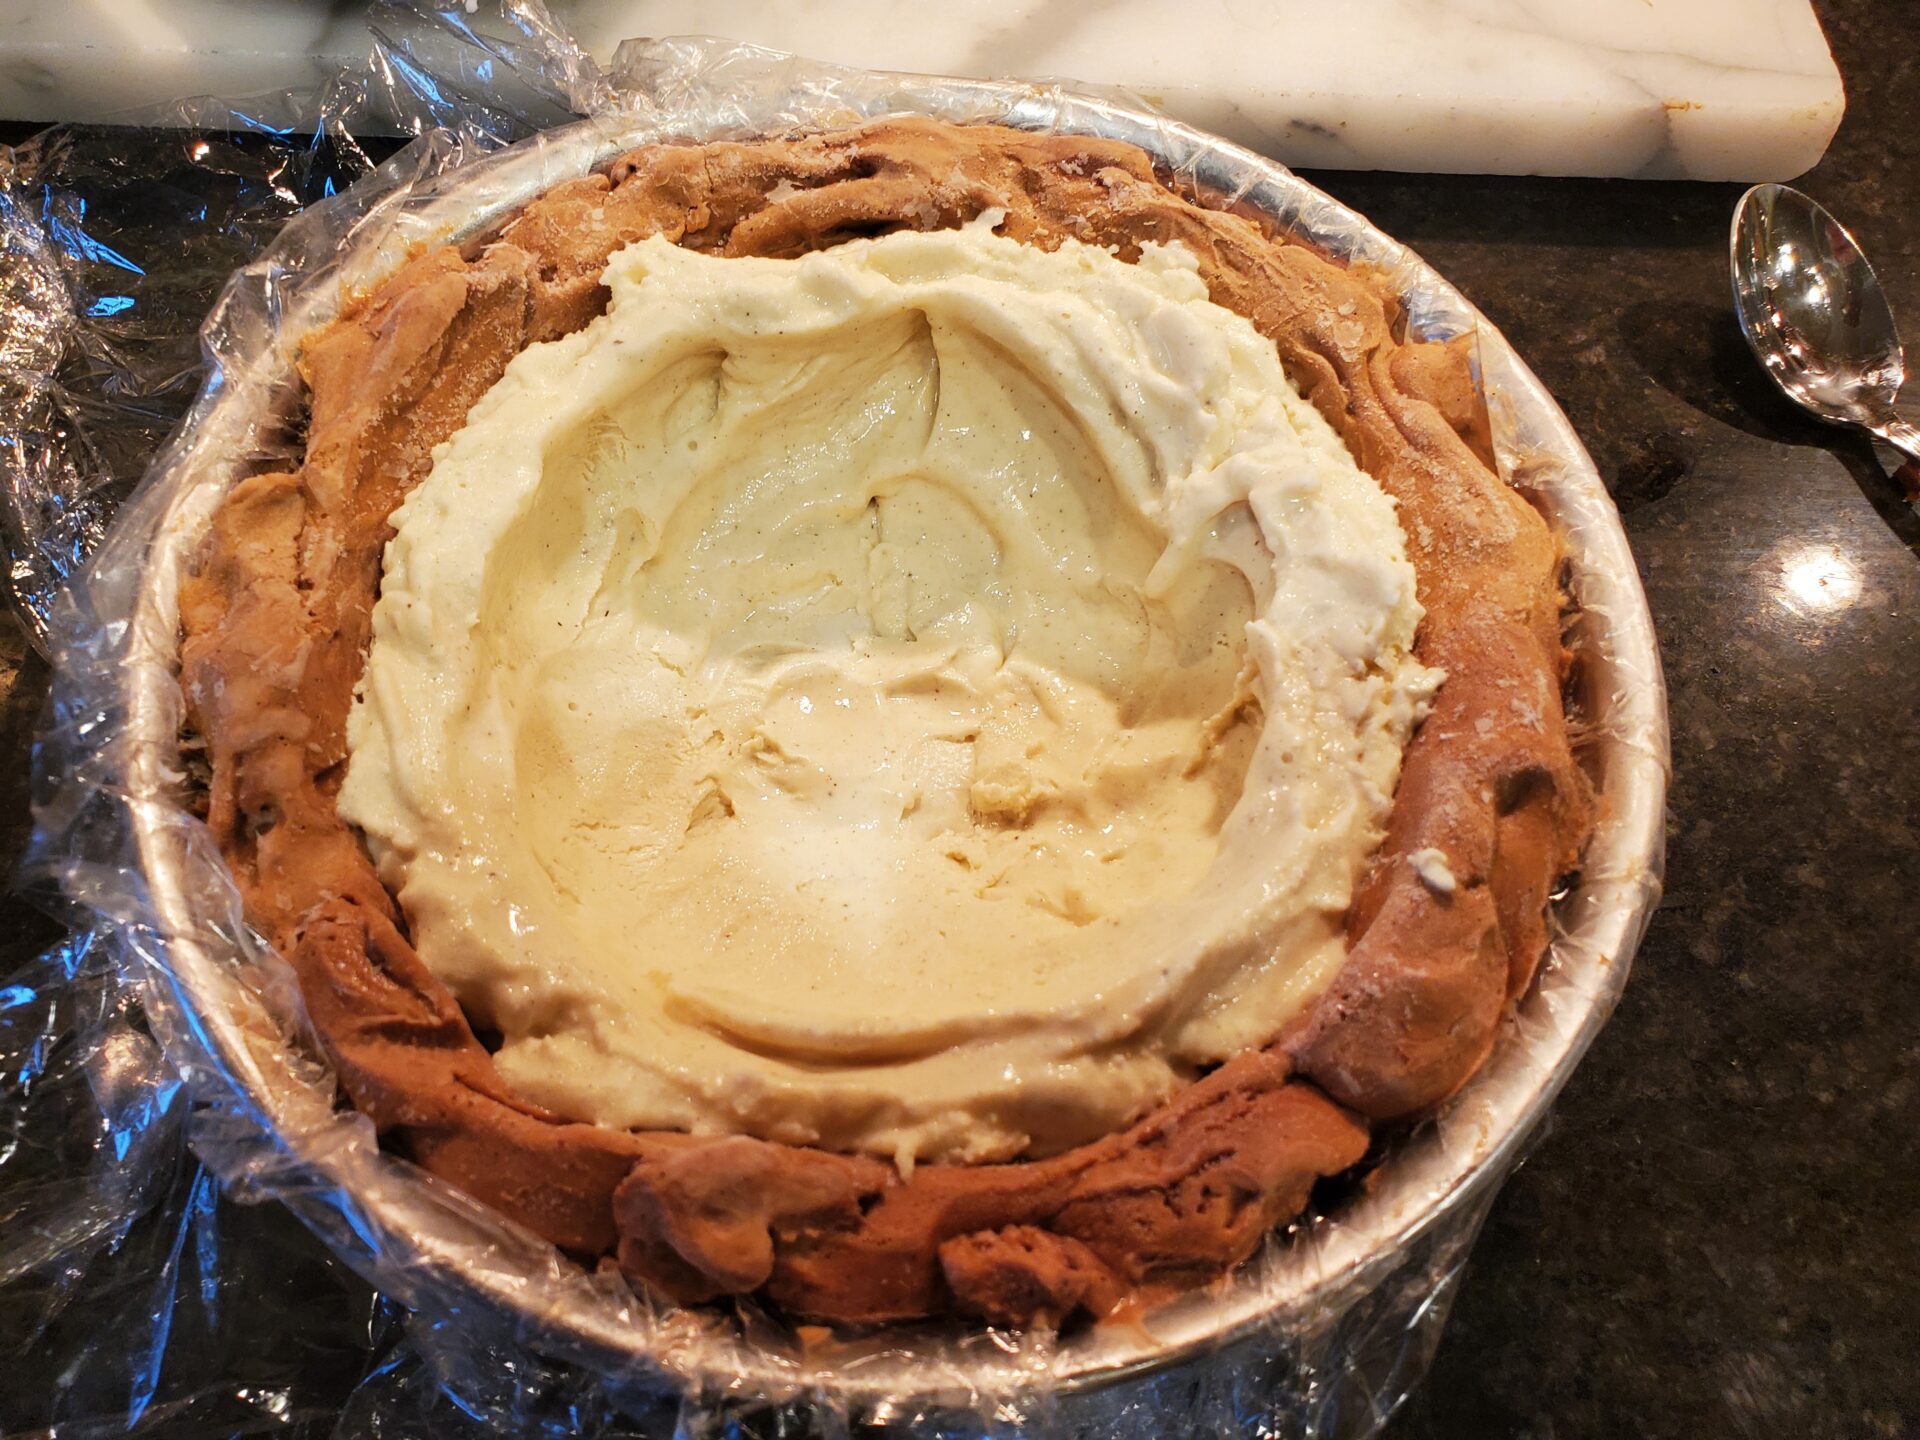
- Using the back of a teaspoon spoon dipped in hot water, spread a core layer of ice cream, filling approximately â…“ of the bowl. Freeze several hours until solid.
- Repeat with next two flavors. When final flavor is added (before returning to freezer)1 proceed to next step, adding the sponge cake circle.
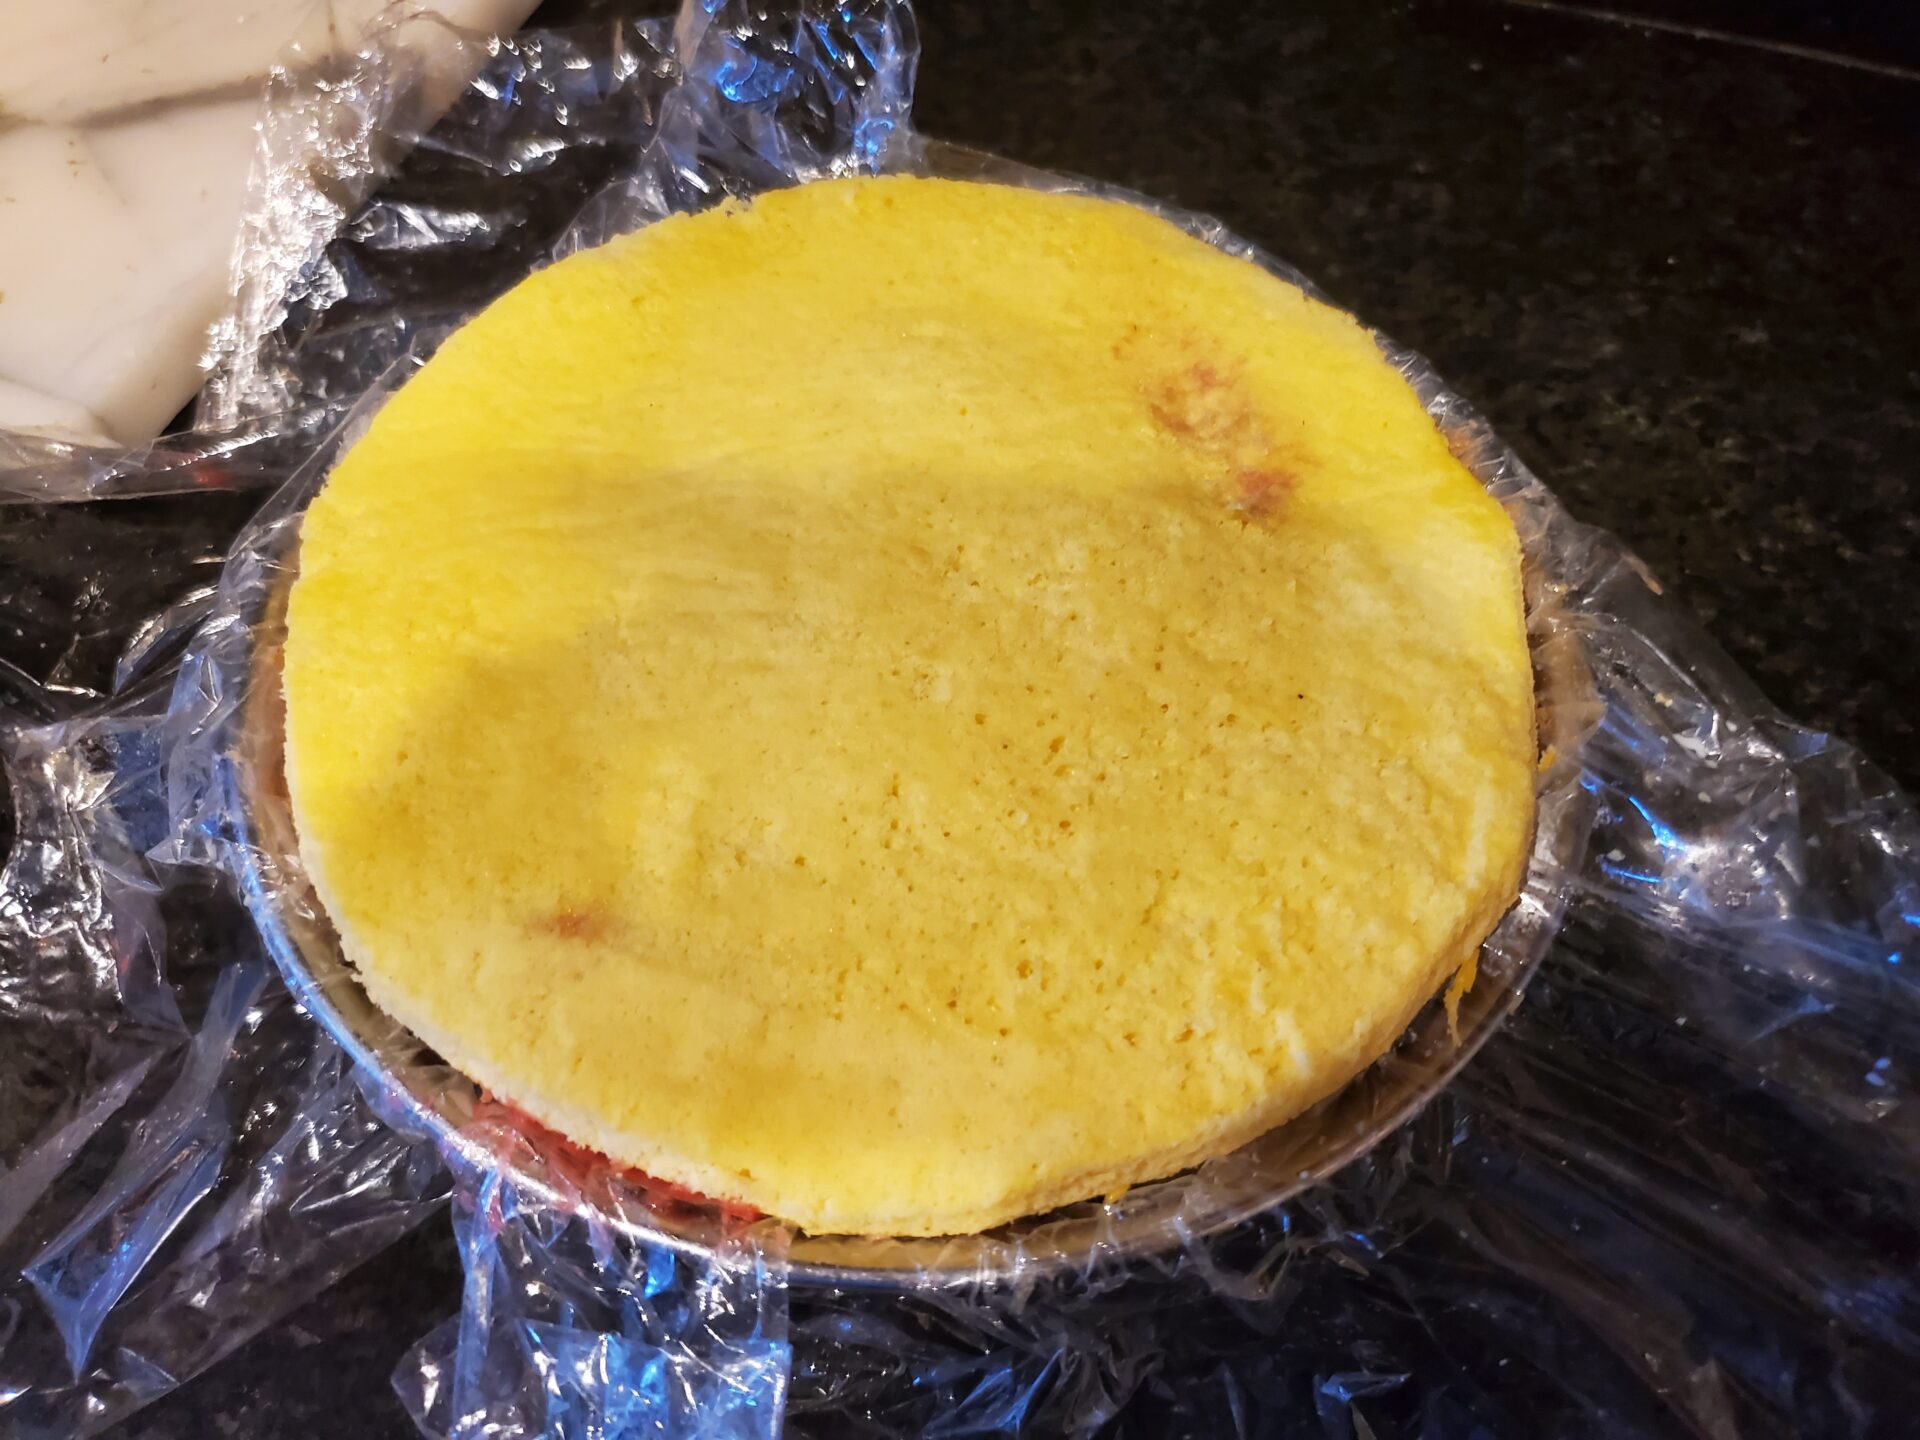
Adding the sponge cake circle:
- Remove the sponge circle from freezer, and if necessary, use kitchen scissors to cut the exact inside diameter of the bowl.
- Firmly press top side of the cake circle (which is stickier) against the ice cream, wrap well with plastic film and return to freezer.
Icing with Italian Meringue:
- Make Italian Meringue.
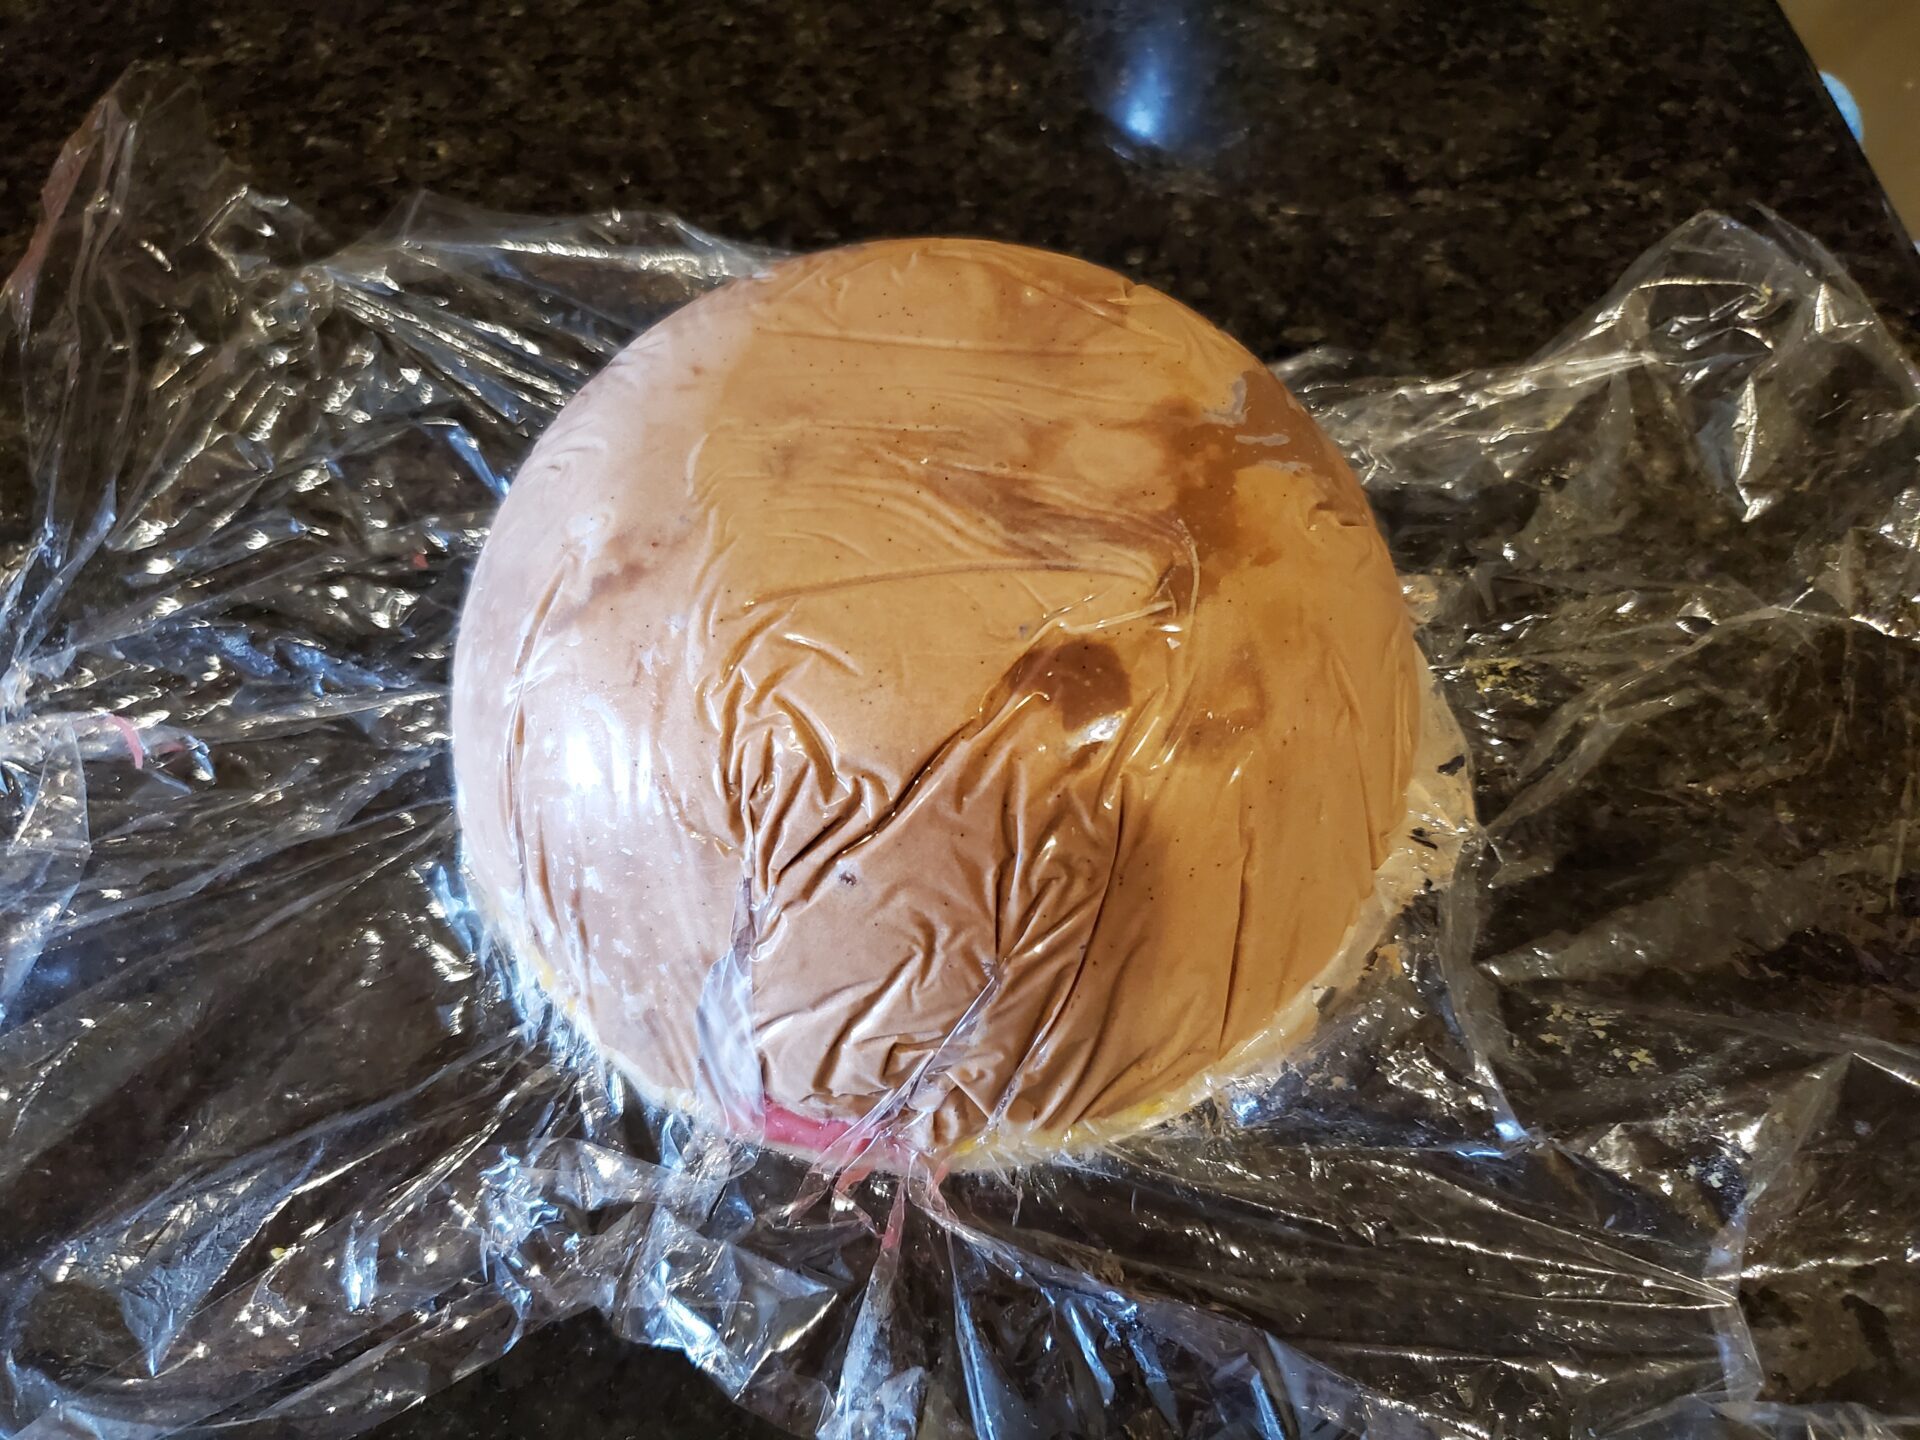
- Remove the bowl from the freezer and place the bottom on a plate or cardboard circle.
- Pull on the plastic film to remove from the bowl
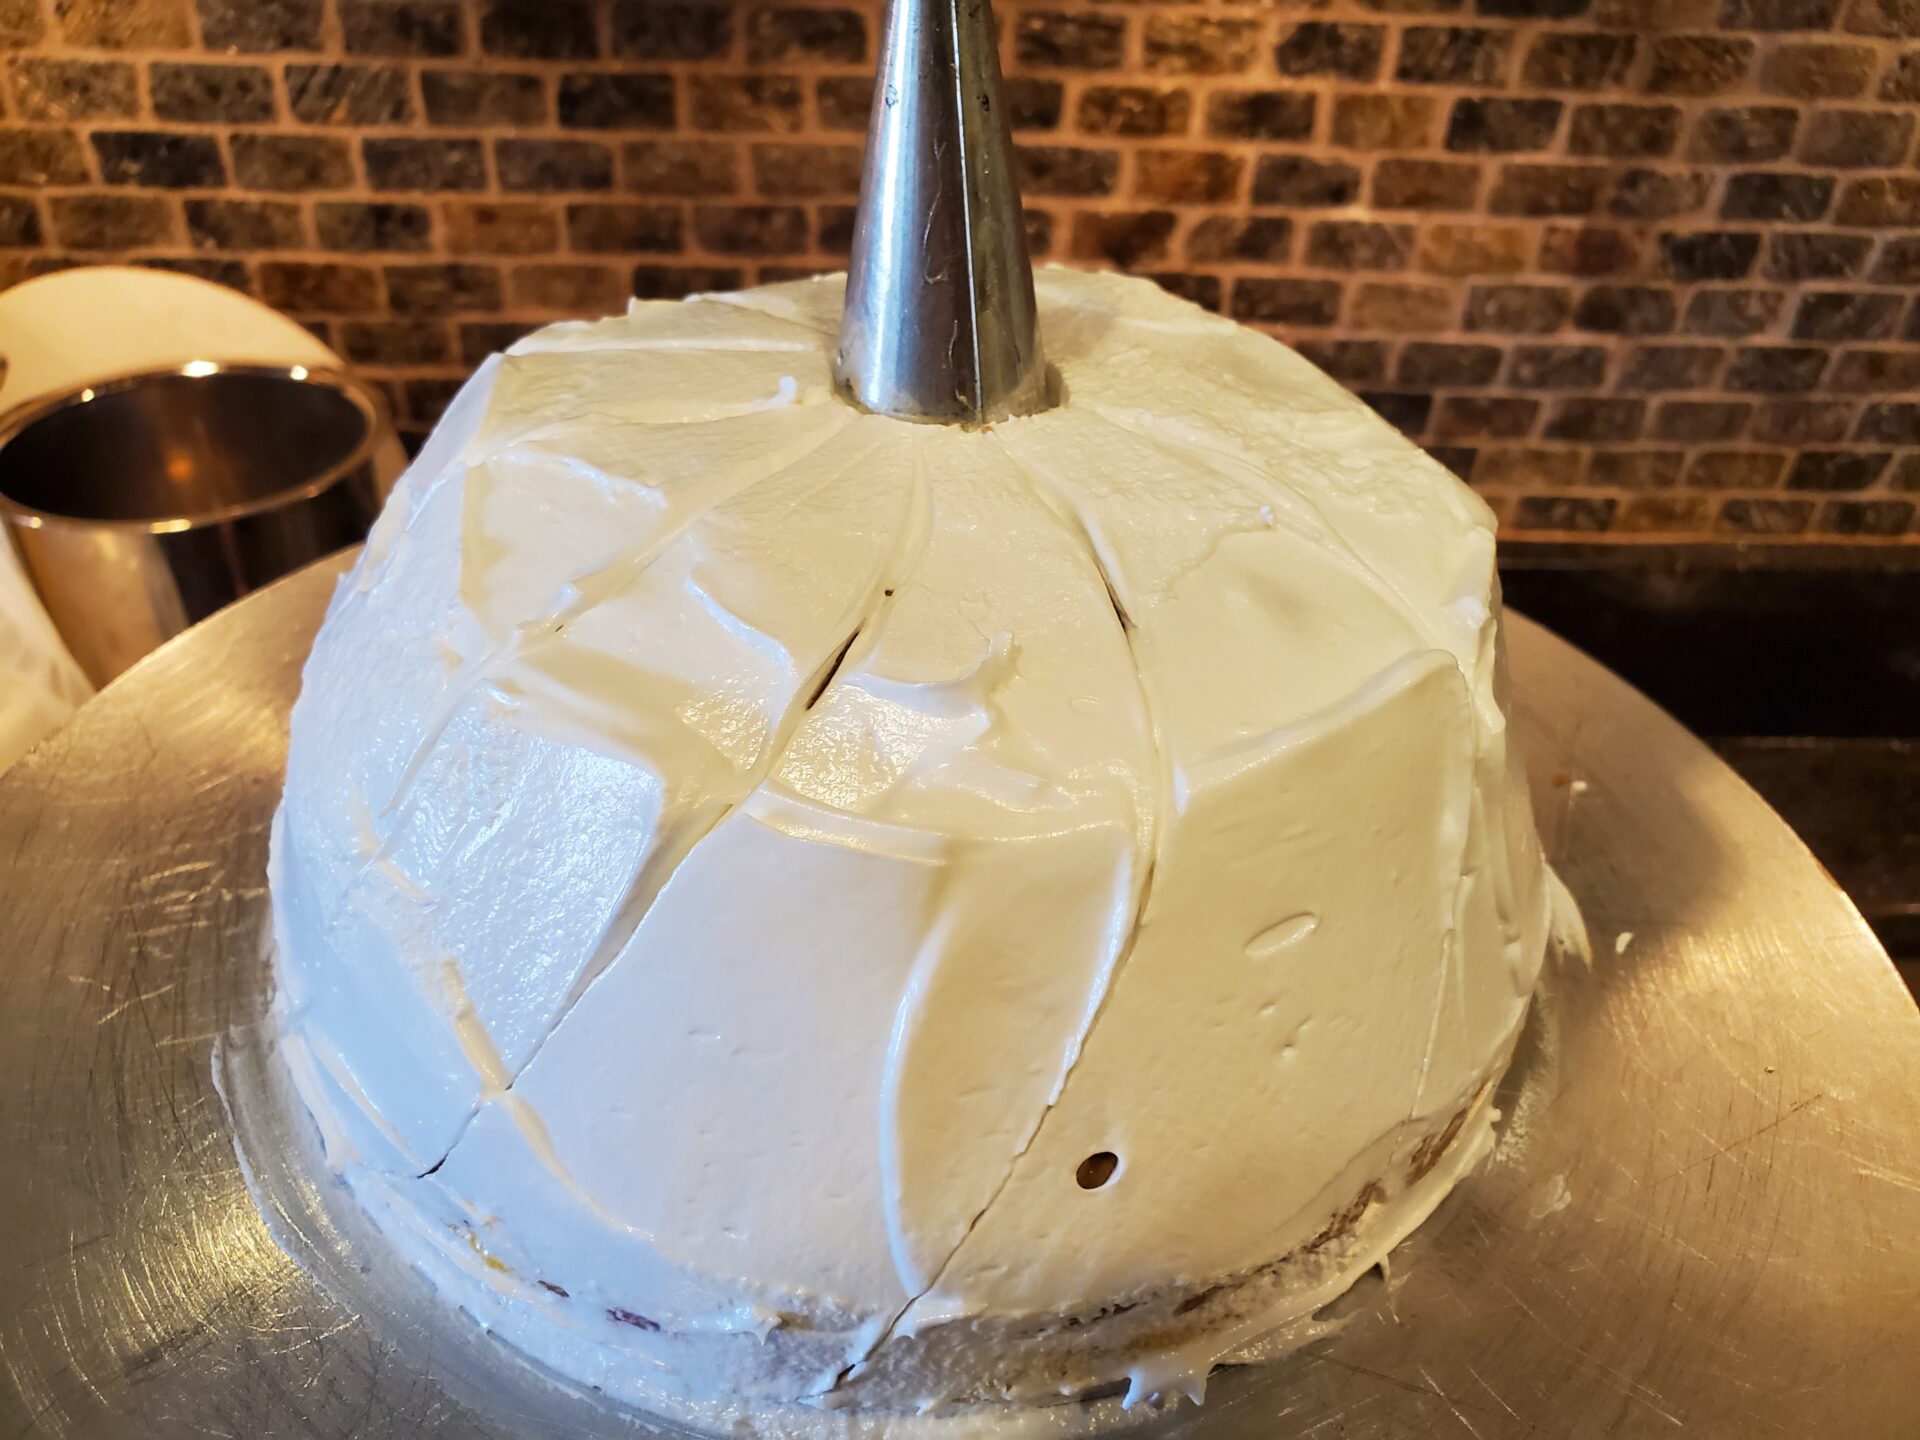
- Spread a thin layer of meringue over the outer layer of ice cream.
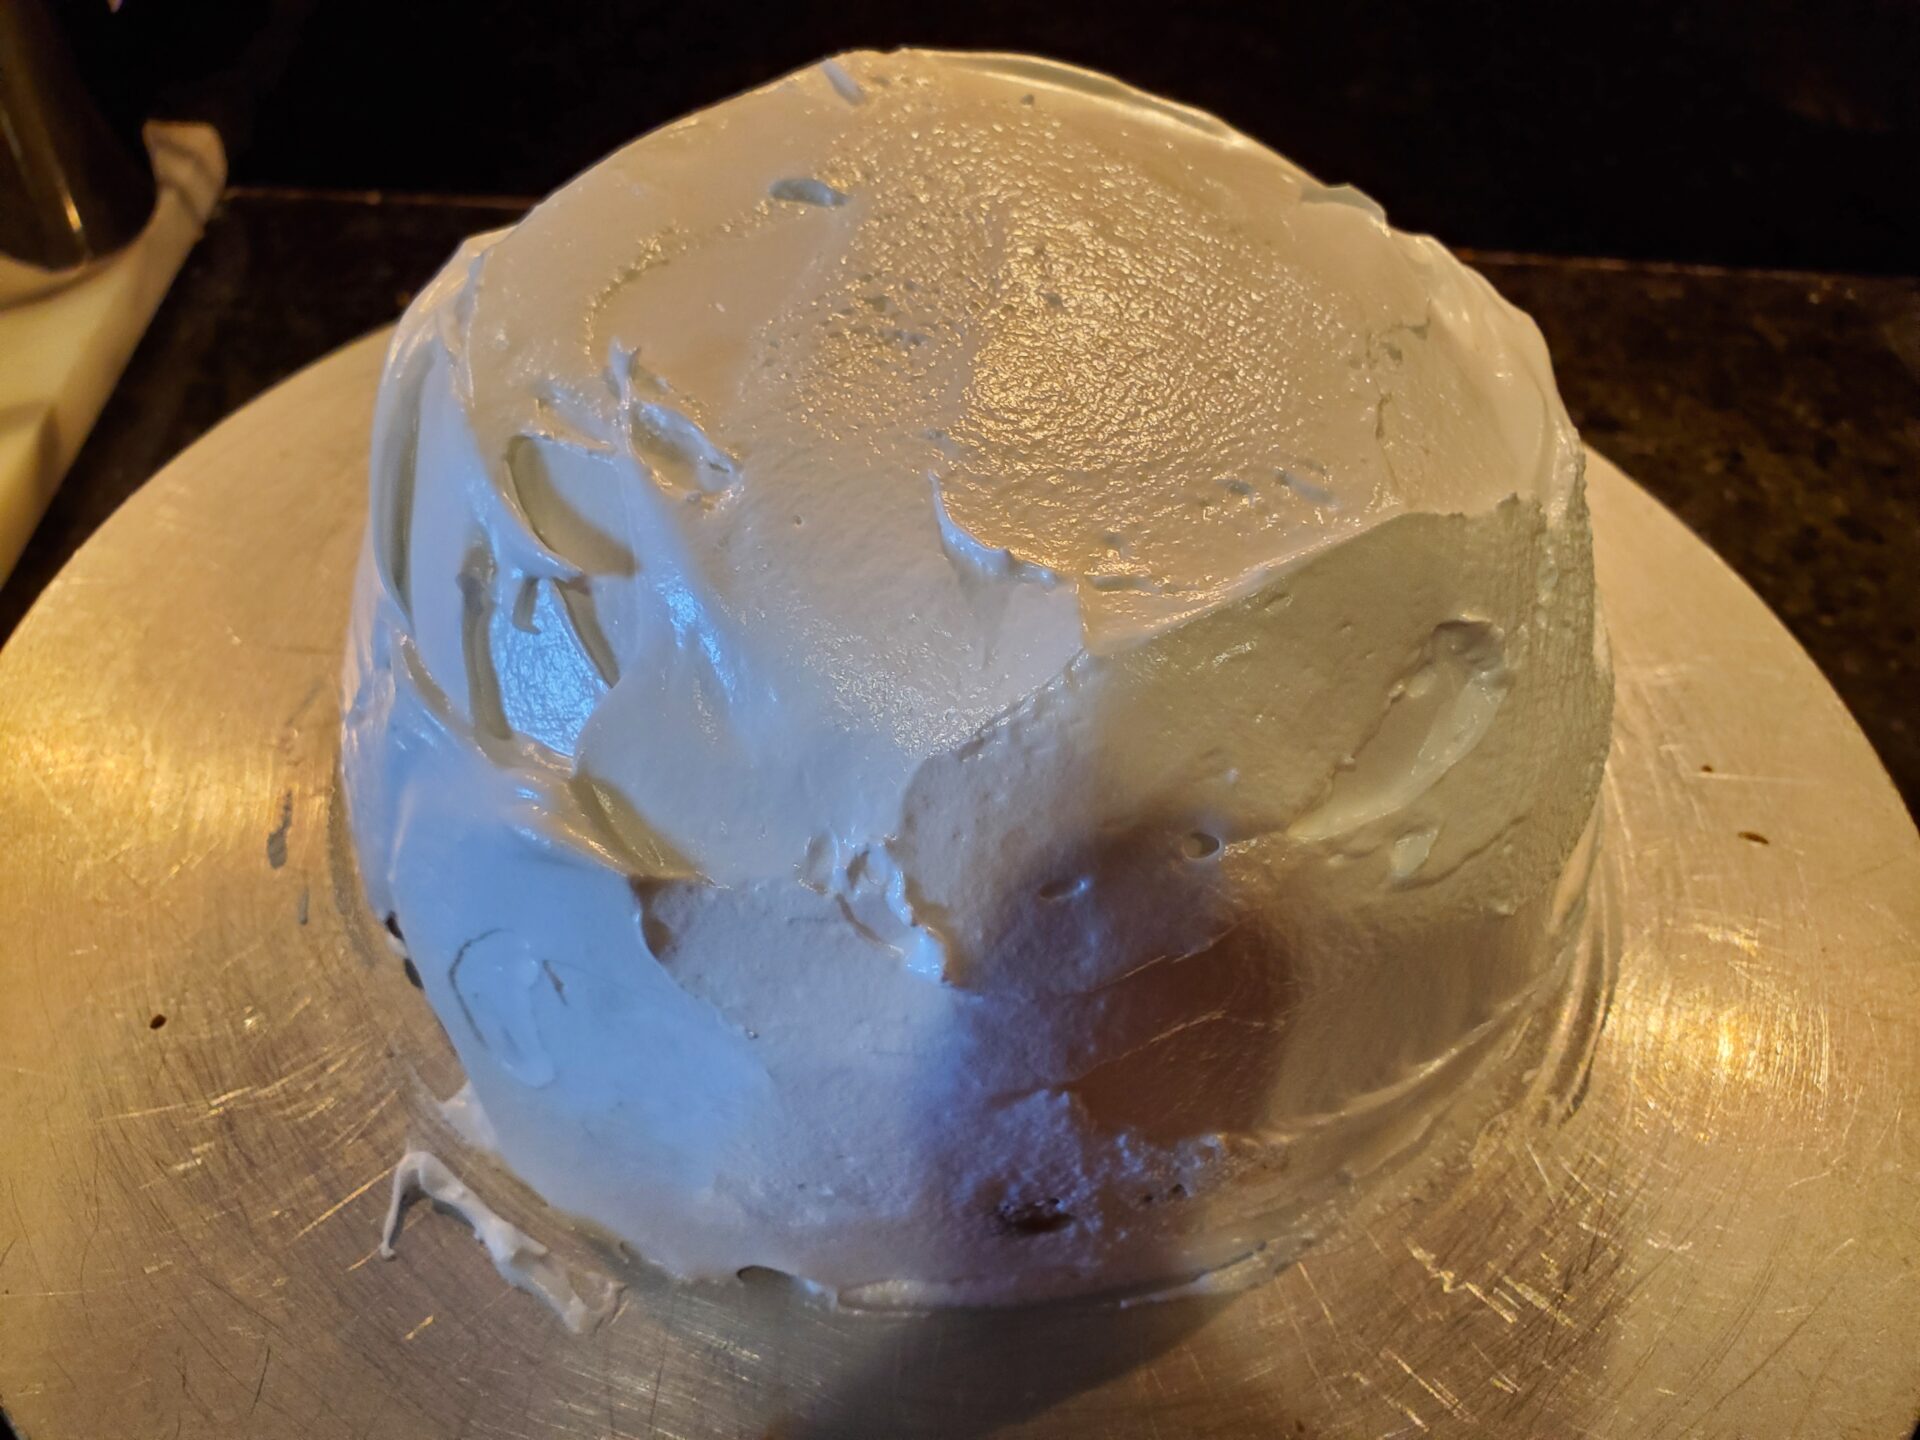
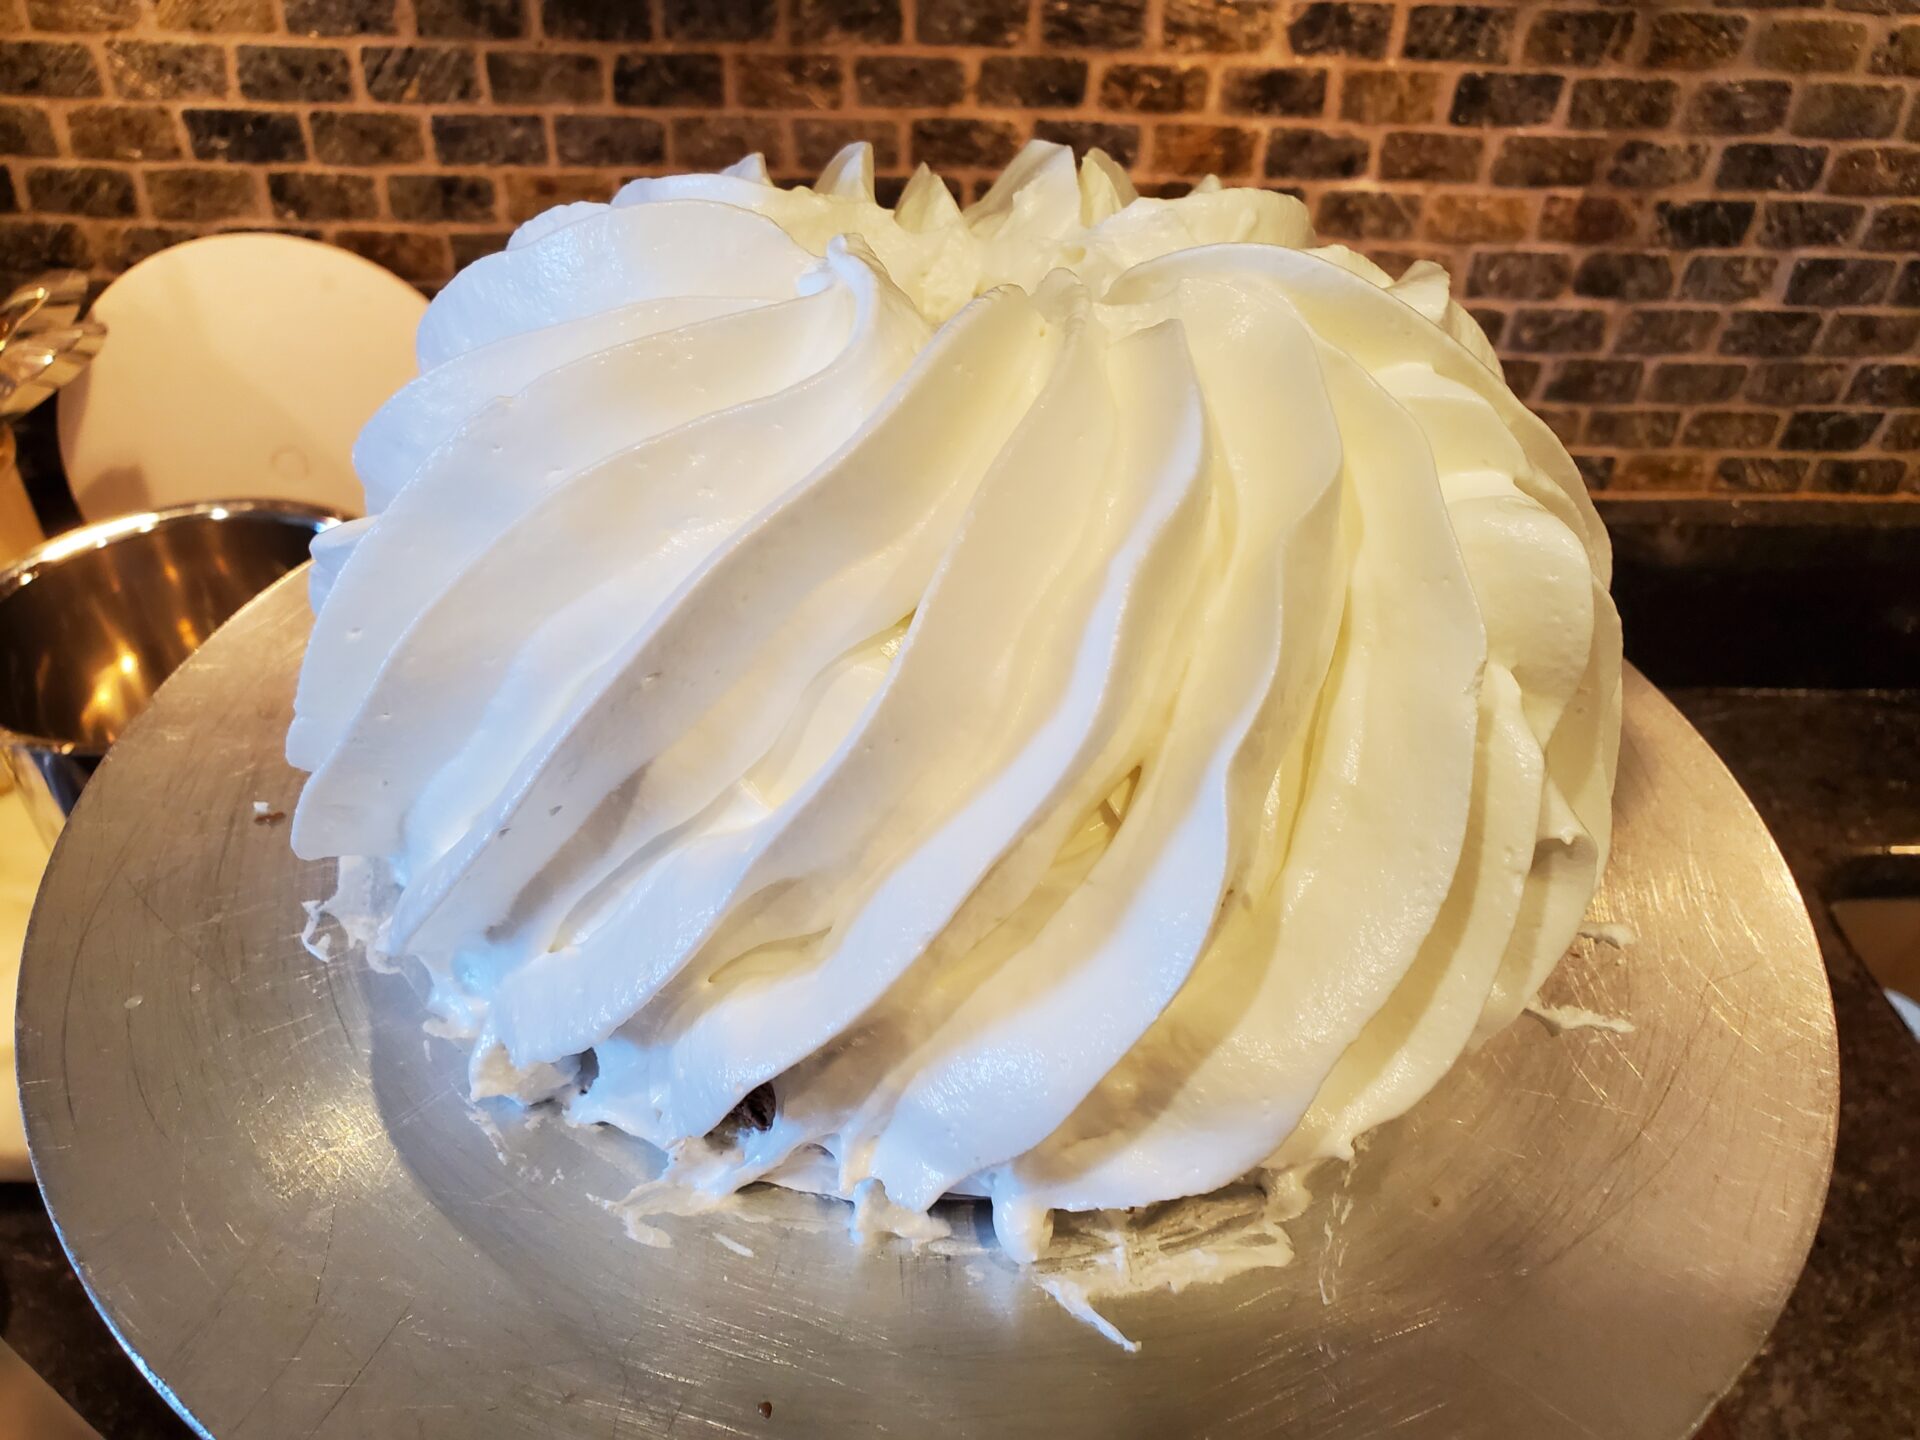
- Fill a pastry bag with meringue and pipe a covering of meringue over the ice cream in a design of choice. Here I used a Saint Honore tip and found it useful to place an upside-down tip to maintain the center as I piped. The meringue may also be spread, with peaks created similar to classic lemon meringue pie.
- Place in a secure spot in the freezer.
- Once frozen, carefully cover the Baked Alaska in plastic film. Note – the meringue will not freeze solid so don’t press against it.
- At this stage the Baked Alaska may be stored in the freezer for up to 5 days.
Finishing: (two methods)
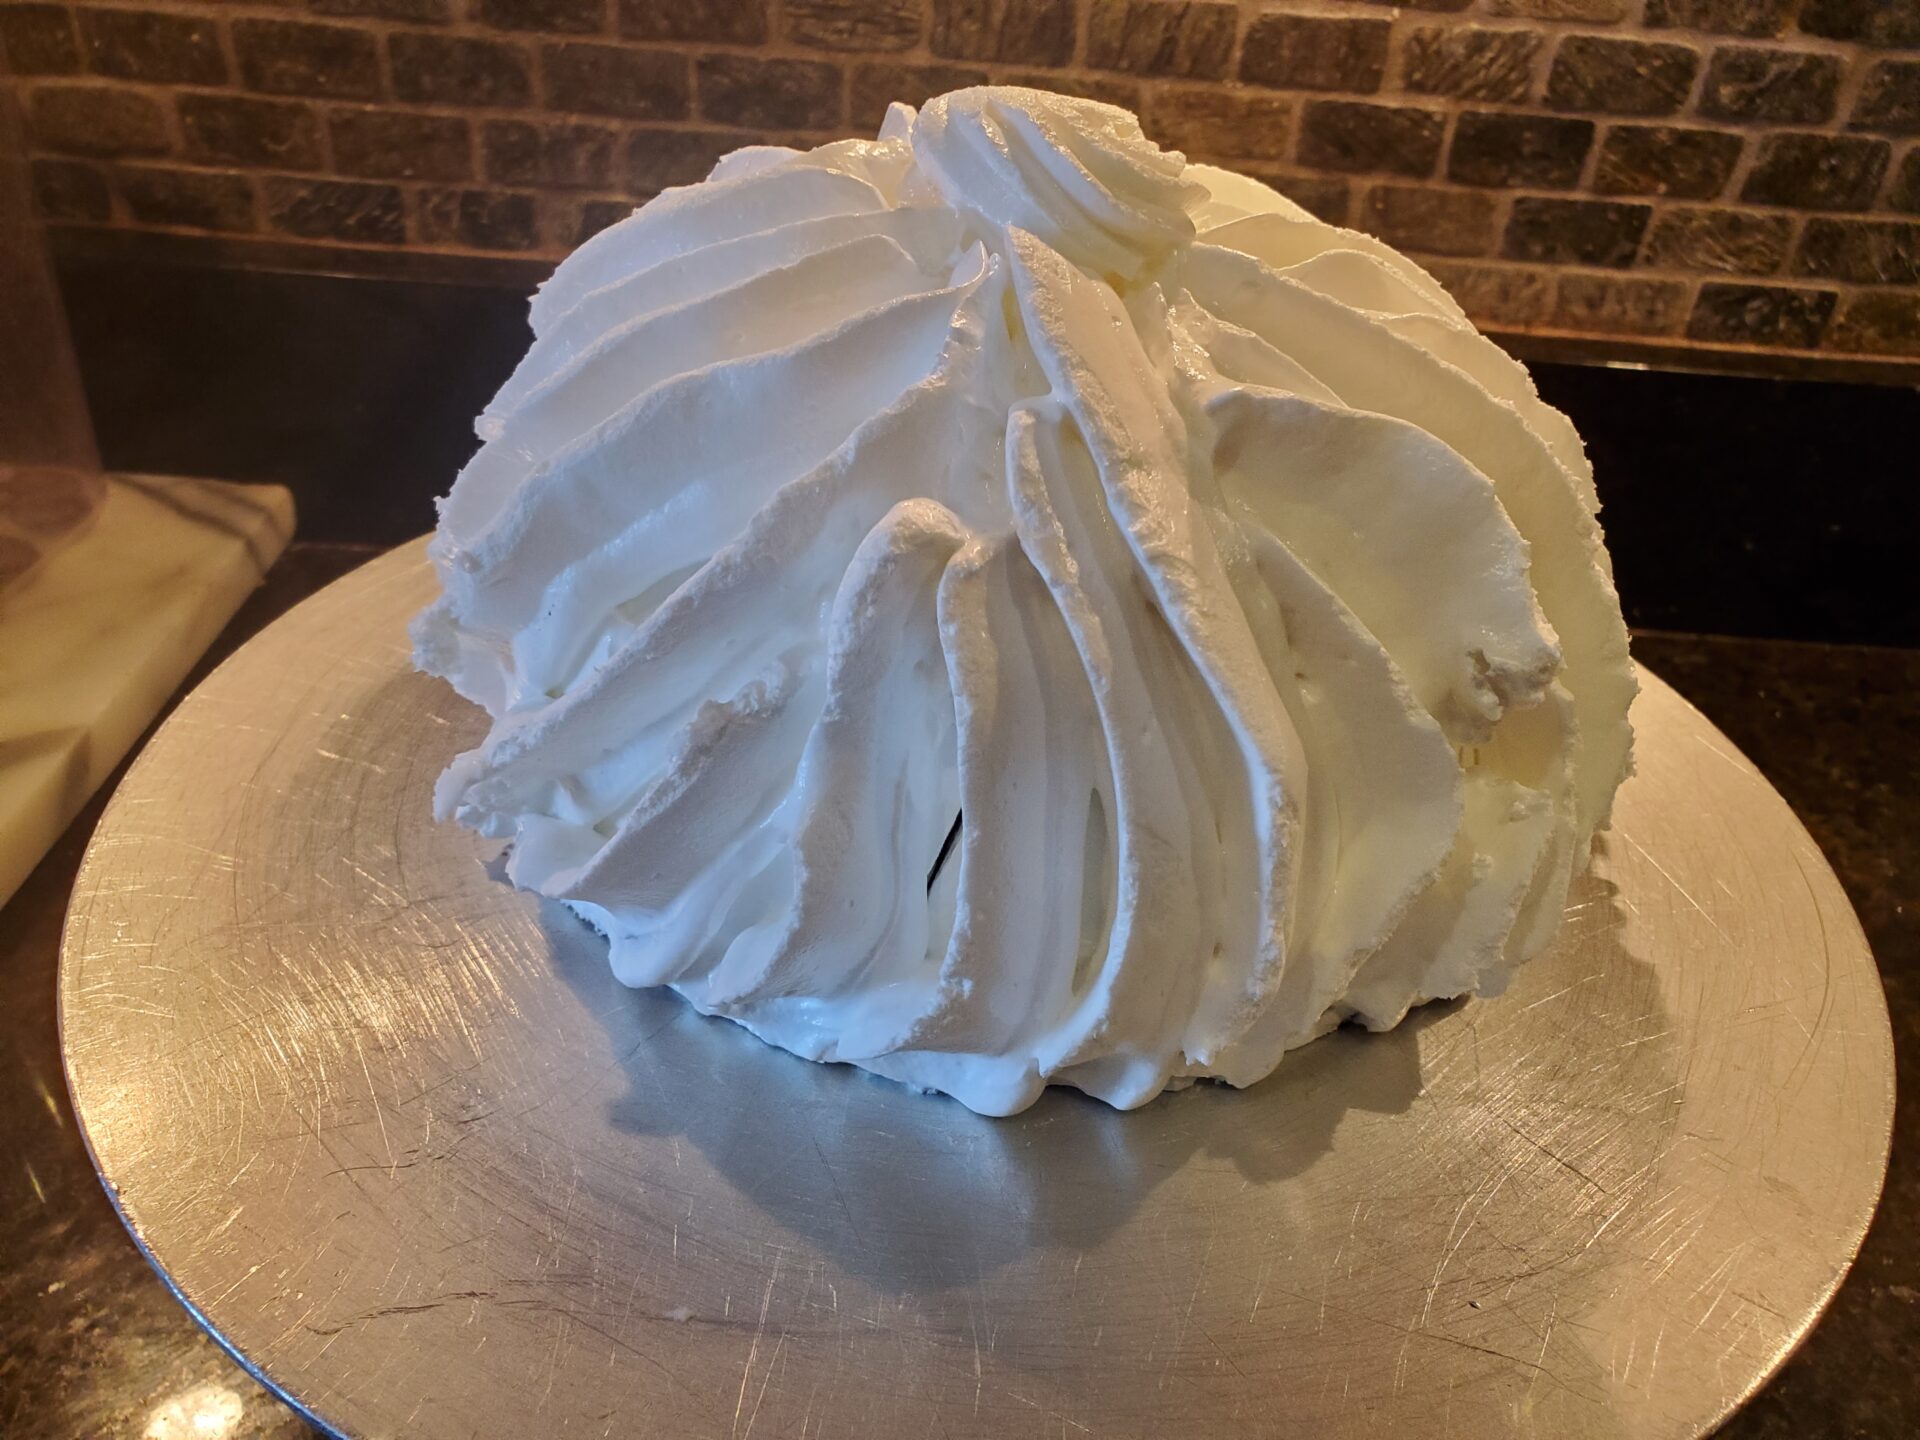
- Method 1: Remove the Baked Alaska from the freezer approximately 20 minutes prior to eating to allow the ice cream to soften. Brown the Italian Meringue with a kitchen torch.
- Method 2: Preheat oven to 450 °F to 475 °F. Take Baked Alaska directly from freezer and bake just until the meringue begins to brown.
Notes:
1 The sponge cake circle is added at this point so the soft ice cream in the core will help it adhere.