Chocolate Nut Layer Cake
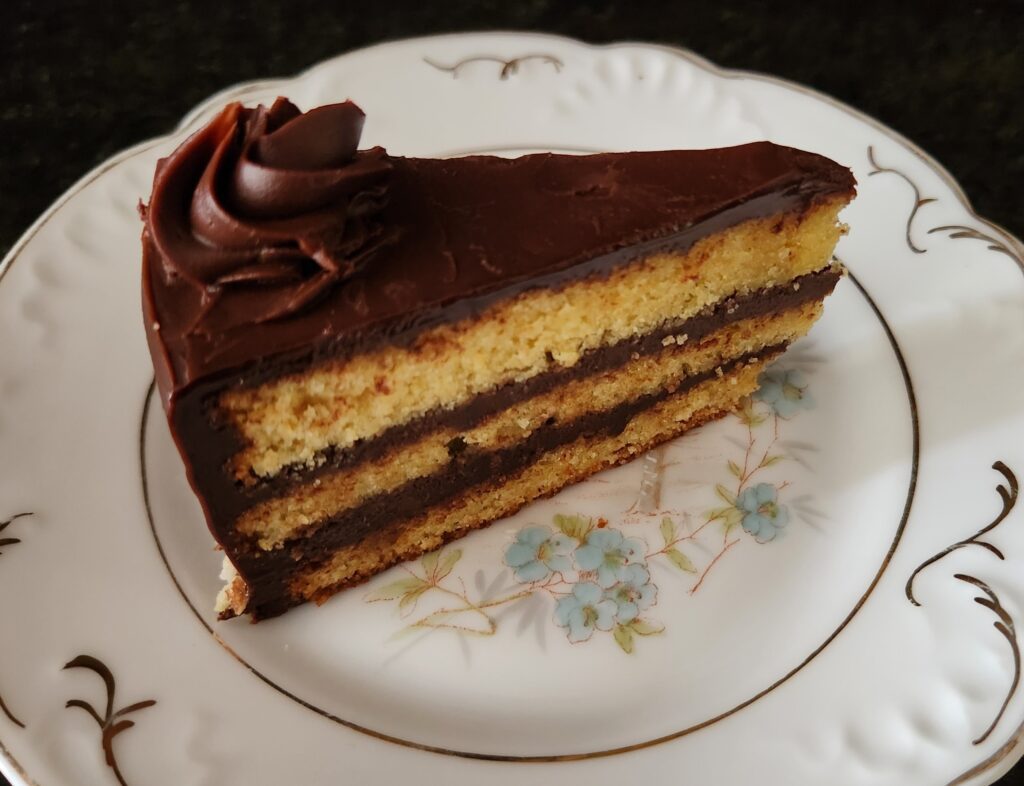
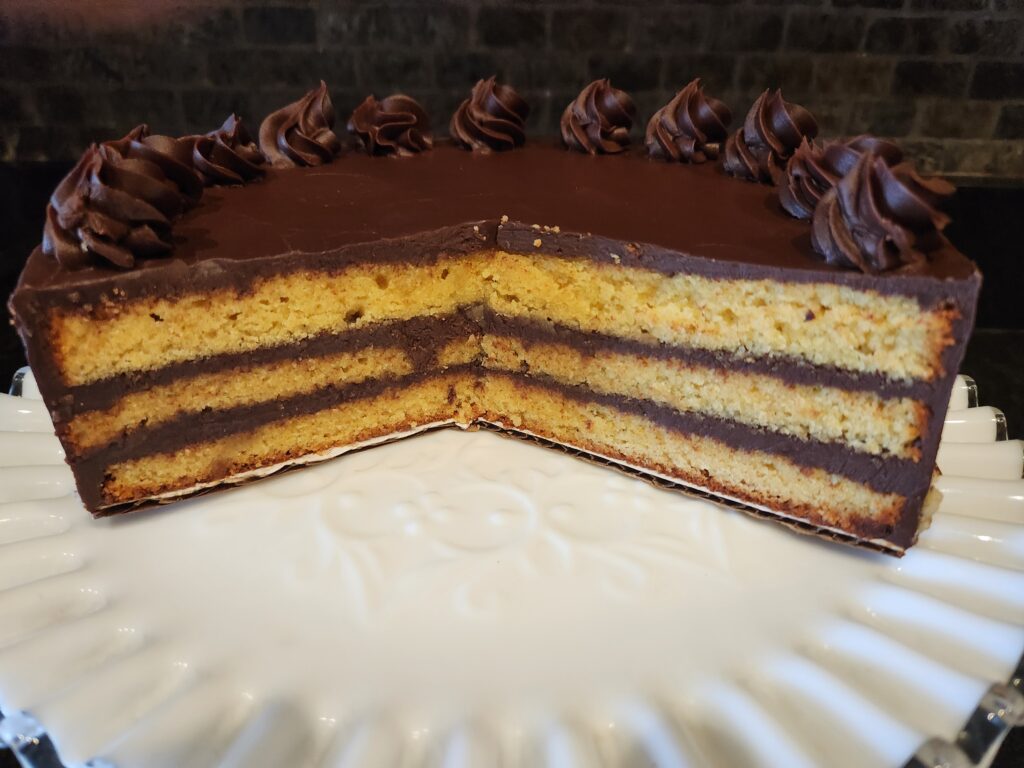
I am very fond of the Nut Torte from an April 2022 blog. It is a simple, delicious cake, and it brings back memories of my time at Patisserie Lanciani, where the recipe originated. To enhance it for this Passover, I decided to make a Chocolate Nut Layer Cake by slicing it in three, and filling it with a velvety smooth, bittersweet chocolate ganache. The almond and hazelnut cake layers complement the chocolate extremely well, and the torte is just rich enough that a small slice is very satisfying.
The Nut Torte contains frangipane, one of the foundation preparations of fine pastry, which in this torte adds moistness and richness. In Passover Frangipane we substitute an equal amount of cake meal for the four teaspoons of flour.
Chocolate Nut Layer Cake meets two of my requirements for a Seder dessert. Firstly, it can sit out at room temperature, freeing up space in the refrigerator for other foods. Secondly, it can be mostly prepared the day ahead, requiring only final assembly on the day of.
This lovely torte is a lovely dessert at any time of the year.
Chocolate Nut Layer Cake
| Yield: 1 8″ cake | # of Servings: 8 to 10 | Difficulty: Moderate |
Ingredients:
Ganache:
1 lb. chocolate, 61% to 64%, wafers, or chopped into pieces
1 pint (16 fl oz) heavy cream
Cake:
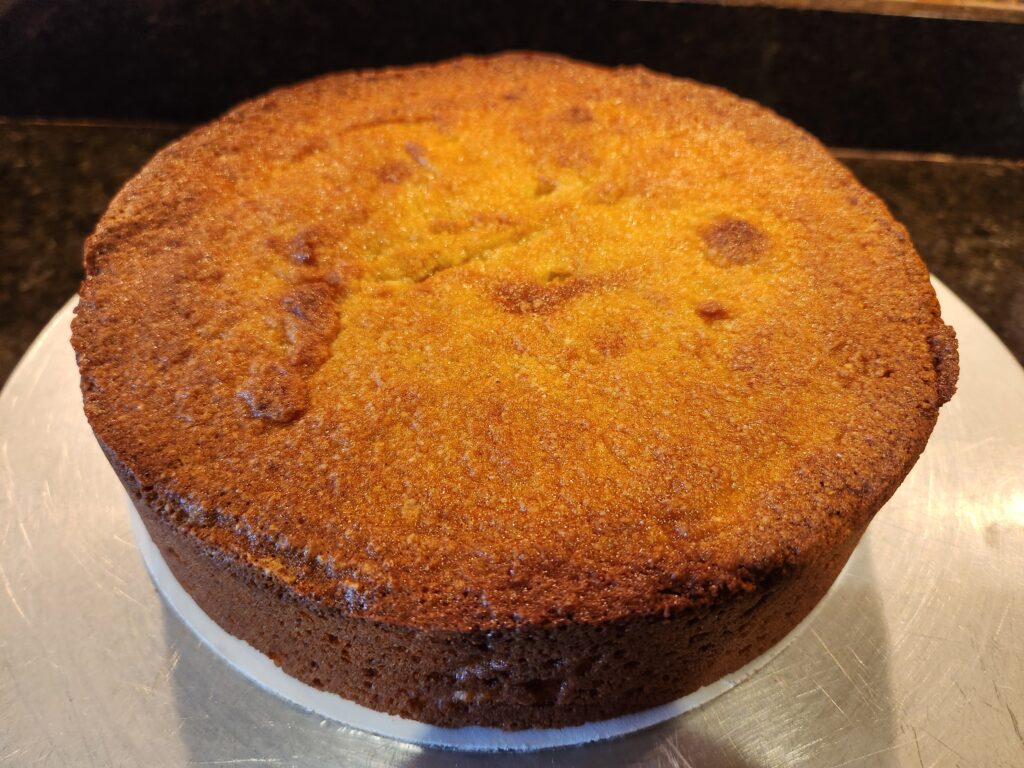
1 recipe Nut Torte
D©cor:
1 cup (4 oz / 113 g) chopped sliced almonds
Special tools and equipment:
- 8″ cardboard cake circle
- Icing spatula
- Plastic pastry bag (21″) with star tip
Pre-recipe preparations:
- The cake may be a baked a day ahead, at the same time as the ganache.
Directions:
Ganache:
- Bring the heavy cream just to the simmer in a heavy-bottomed saucepan. Remove from the heat.
- Add the chocolate, all at once, and cover for 5 minutes.
- Whisk gently until the chocolate is totally dissolved.
- Pour into a clean, wide container, such as a square Pyrex pan. Press a piece of plastic film against the ganache to prevent a film from forming. Let sit overnight at room temperature.
Baking the cake:
- Bake the Nut Torte and let thoroughly cool. Alternatively, bake it a day ahead, and wrap well in plastic wrap, Or, bake it up to two weeks ahead, and store in the freezer.
Finishing:
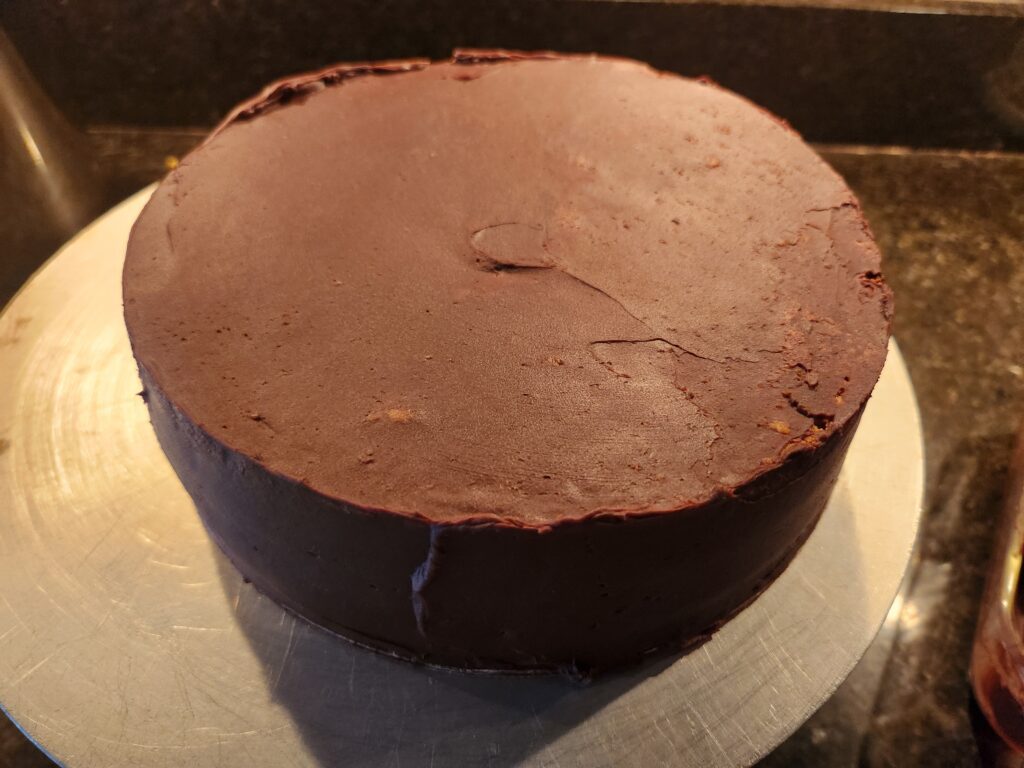
- Using a long, serrated knife, cut the cake into 3 layers. Place the bottom layer on a cardboard circle.
- Spread a ¼” thick layer of ganache on the bottom layer. Place the middle layer over it, and spread the middle layer with another ¼” of ganache. Place the top layer on and press down gently.
- Crumb coat the entire cake by spreading a very thin layer of ganache over it. Let sit for at least one hour, until the outer layer feels totally set.
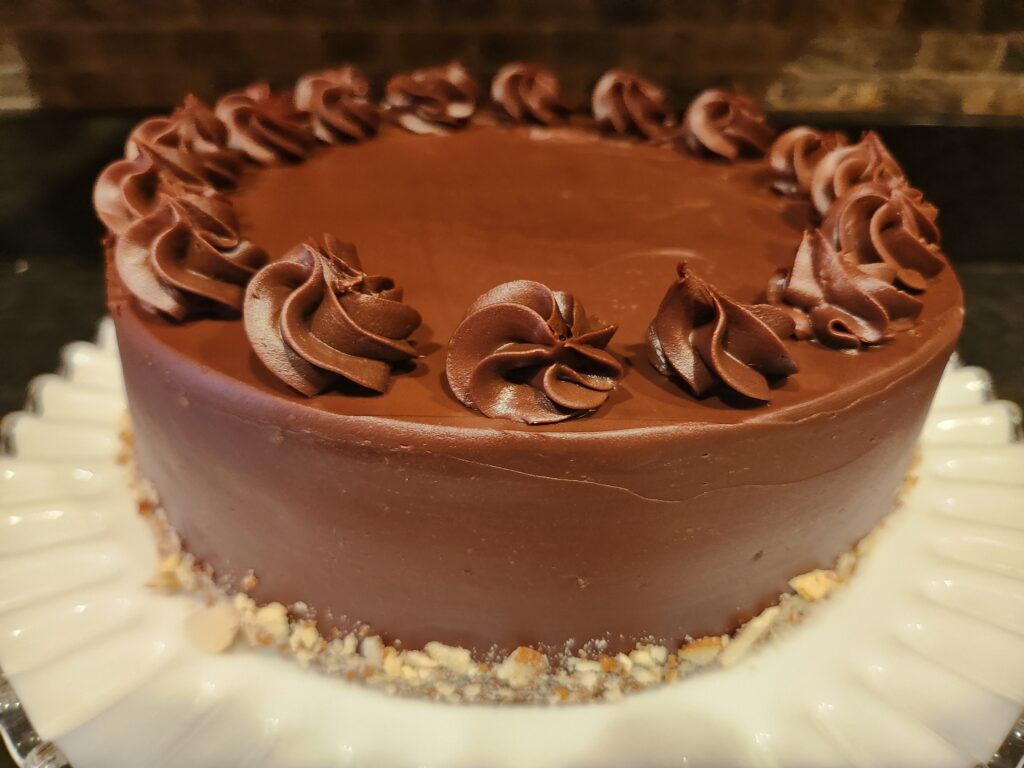
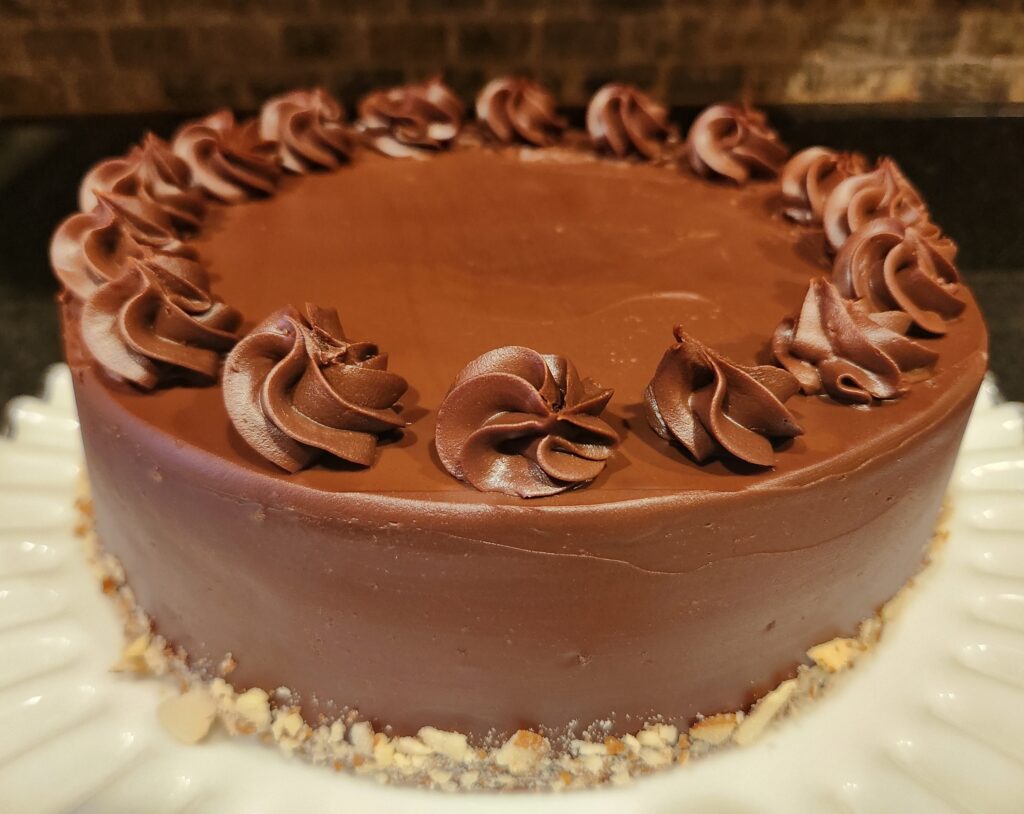
- Finish covering the cake with the ganache, saving a little for the rosettes. Pipe rosettes on top of the cake.
- Press crushed almonds long the bottom of the torte.
- Place on a serving plate. Cake should be served and stored at room temperature.